How to Make Scrabble Tile Pendants
Scrabble tile pendants are hip and trendy, different and fun jewelry pieces that you can make for yourself or give as gifts. They're not too hard to make (but who needs to know?) and will definitely draw attention and delighted surprise when you reveal their humble origins as Scrabble game pieces.
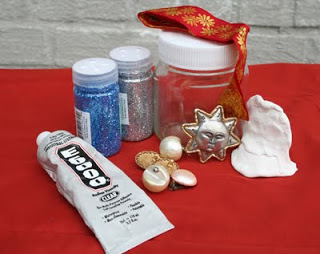
Materials
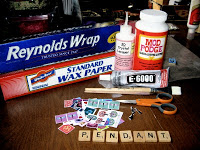
You will need:
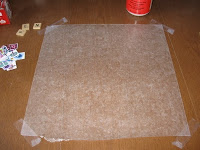
First prepare your work surface by laying out a piece of wax paper and taping down the corners.
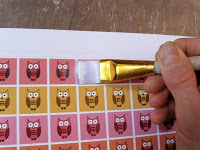
Next, treat your sheet of laser-printed images with a coat of Modge Podge and let dry (about 10 mins.)
Cut out your images and size them to the tiles you want to use.
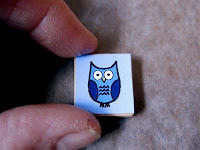
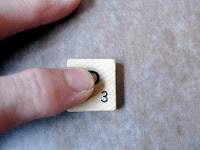
Before applying adhesive to the back of the tile, make sure it's right-side up. Obvious, I know, but I've made this mistake so I thought it worth mentioning!
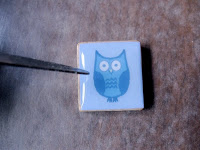
Using a paintbrush, apply a coat of Modge Podge to the back of the tile. Add image. Fine-tune its placement on the tile and press it into place. Then flip it over so it's face-down on the wax paper and press down again to get rid of any excess Modge Podge and/or air pockets. Flip the tile over again so it's face-up and let dry, about 30 minutes.
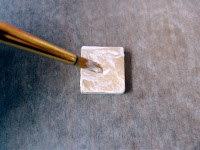

Carefully trim any paper hanging over the edges of the tile with a scissor or Exact-o knife. Then apply the top coat of varnish (3D Crystal Lacquer). Start by going around the perimeter of the image, then fill in the center.

Remove any bubbles in the varnish by gently sweeping them off the tile with a toothpick or other small tool. I use a little spatula-like tool.
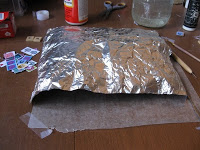
Place under an aluminum-foil canopy to dry protected from dust, at least 8 but preferably 12 hours.
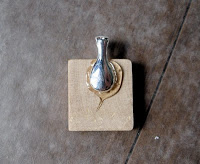
Attach a jewelry bail to the back of the tile with E-6000 glue and let dry, about an hour.
Give the varnish a chance to cure, about 3 days, and voilà! Your own hip and trendy Scrabble-tile jewelry piece is complete! Hang on a chain and wait for the compliments to start rolling in.
Good luck and enjoy!
Until next time --

Linda
PurtyBird
Materials
You will need:
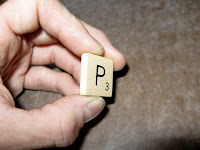
- Scrabble tiles -- I buy mine on ebay or Etsy.
- Jewelry bails
- Modge Podge
- 3D Crystal Lacquer (or Diamond Glaze or equivalent)
- E-6000 glue
- Images -- I design my own but you can also get them on Etsy (search for "collage sheet"). Laser-print them on your own printer if you have one or use a copy/print service like Staples or FedEx Office.
- Jewelry bails -- available from numerous sellers on Etsy.
- Paint brushes -- 1 for coating images with Modge Podge and another for adhering them to Scrabble tiles.
- Wax paper
- Tape
- Sharp scissors
First prepare your work surface by laying out a piece of wax paper and taping down the corners.
Next, treat your sheet of laser-printed images with a coat of Modge Podge and let dry (about 10 mins.)
Cut out your images and size them to the tiles you want to use.
Before applying adhesive to the back of the tile, make sure it's right-side up. Obvious, I know, but I've made this mistake so I thought it worth mentioning!
Using a paintbrush, apply a coat of Modge Podge to the back of the tile. Add image. Fine-tune its placement on the tile and press it into place. Then flip it over so it's face-down on the wax paper and press down again to get rid of any excess Modge Podge and/or air pockets. Flip the tile over again so it's face-up and let dry, about 30 minutes.
Carefully trim any paper hanging over the edges of the tile with a scissor or Exact-o knife. Then apply the top coat of varnish (3D Crystal Lacquer). Start by going around the perimeter of the image, then fill in the center.
Remove any bubbles in the varnish by gently sweeping them off the tile with a toothpick or other small tool. I use a little spatula-like tool.
Place under an aluminum-foil canopy to dry protected from dust, at least 8 but preferably 12 hours.
Attach a jewelry bail to the back of the tile with E-6000 glue and let dry, about an hour.
Give the varnish a chance to cure, about 3 days, and voilà! Your own hip and trendy Scrabble-tile jewelry piece is complete! Hang on a chain and wait for the compliments to start rolling in.
Good luck and enjoy!
Until next time --
Linda