Egghead Learns to Sew, Part III
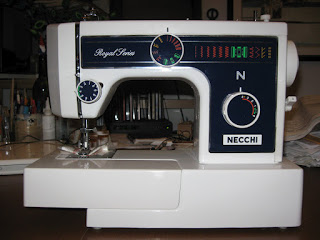
Today I thread the needle (or "upper thread," in the parlance of the Instruction Manual) of my fabulous Christmas-gift sewing machine, inching ever closer to efficiently and effectively stitching fabric and making all kinds of wonderful textile-artistic things! Yay!
Excitement is beginning to overtake the nervousness I initially felt at this prospect.
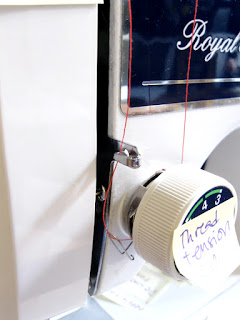
Pull the thread down to the thread tension dial. Just behind the dial itself are a couple of circular plates. The space between the plates is where the thread passes through. Attached to the tension knob/twin plates is a delicate little hooky-loopy thing. Pass the thread in-between the plates and through the delicate hooky-loop (Step C on the diagram).
Now, pull the thread up and through another hook located just above and to the left of the thread tension dial/twin plates (Step E).
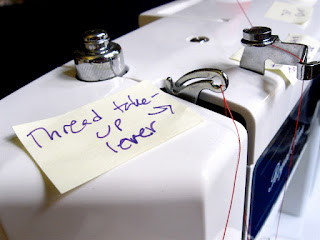
Keep pulling up. Pass the thread through the thread take-up lever (Step F). It's probably easiest to do this if the lever is in its upper-most position. To get it there, turn the hand wheel clutch (the larger of the two wheels on the right side of the machine) slowly towards you.
Next, open the face cover and pull the thread down and through another hooky thing located at the very bottom of that whole inside-the face-cover section of the machine (Step G). Close the face cover.

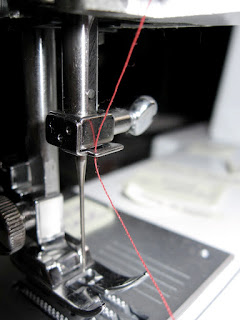
Keep pulling down and pass the thread through a final hooky-loopy thing located at the base of the needle bar (Step H).
Now, get ready. You're about to complete the circuit of hooky-loopy things and actually thread the needle of the machine. The diagram combines this step with Step H above but I think it deserves its own Step. After all, it is the gateway Step to effectively and efficiently stitching up all kind of wonderfulness. I know you can hardly stand the anticipation anymore, so without further ado....
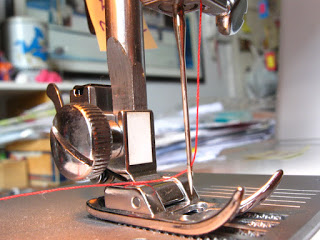
Find the eye of the needle. It's just above the pointy end. Pull the thread down so you have a little slack. Then pass the end of the thread through the eye and pull it toward the back of the machine.

Excitement is beginning to overtake the nervousness I initially felt at this prospect.
The Parts
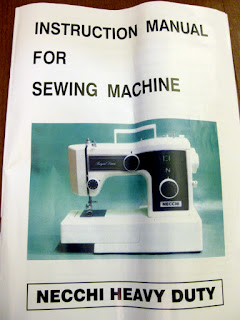
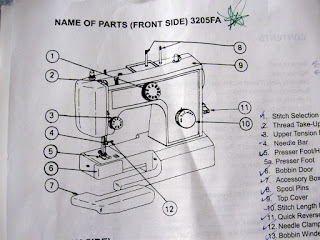
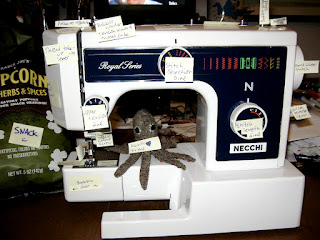
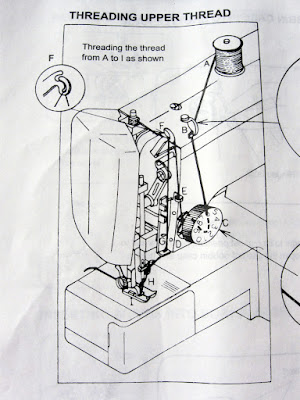
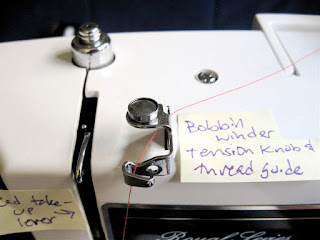
Threading the upper thread involves a few previously labeled parts of the machine, namely, the spool pin, bobbin-winder/thread guide, thread tension knob (although indirectly), and the thread take-up lever; plus a few unnamed parts. One of the unnamed parts is located behind the the face plate cover. The others are attached to the named parts, which may explain why they're not specifically named. In any case, the Instruction Manual provides a diagram (pictured above) of the path the thread is supposed to travel through these parts on its way to the needle. While it's reasonably easy to follow, it would benefit from color photos and a bit of narrative. This is where the the current post comes in.The Steps
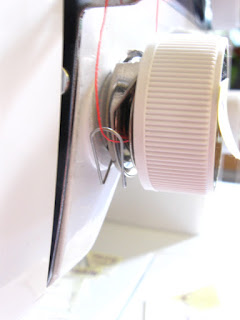
Obviously, the first step is to place thread on the spool pin. (This is Step A on the diagram, in case you're following that as well.) Now you're on your way. The thread's first touch-point is the bobbin-winder tension knob and thread guide. Pass the thread under the bobbin-winder aspect of this part of the machine (the circular bit in top) and through the little horizontal hook part just below and in front of it (Step B on the diagram).Pull the thread down to the thread tension dial. Just behind the dial itself are a couple of circular plates. The space between the plates is where the thread passes through. Attached to the tension knob/twin plates is a delicate little hooky-loopy thing. Pass the thread in-between the plates and through the delicate hooky-loop (Step C on the diagram).
Now, pull the thread up and through another hook located just above and to the left of the thread tension dial/twin plates (Step E).
Keep pulling up. Pass the thread through the thread take-up lever (Step F). It's probably easiest to do this if the lever is in its upper-most position. To get it there, turn the hand wheel clutch (the larger of the two wheels on the right side of the machine) slowly towards you.
Next, open the face cover and pull the thread down and through another hooky thing located at the very bottom of that whole inside-the face-cover section of the machine (Step G). Close the face cover.
Keep pulling down and pass the thread through a final hooky-loopy thing located at the base of the needle bar (Step H).
Now, get ready. You're about to complete the circuit of hooky-loopy things and actually thread the needle of the machine. The diagram combines this step with Step H above but I think it deserves its own Step. After all, it is the gateway Step to effectively and efficiently stitching up all kind of wonderfulness. I know you can hardly stand the anticipation anymore, so without further ado....
You did it! Make yourself a cup of tea and relax for a while before moving onto the final set of precursor steps to learning to sew on a machine, namely, inserting the bobbin into the bobbin case and uniting the bobbin thread with the thread you just threaded. What?! Don't worry, I'll explain.
Until next time --
Linda