What to Do With Scraps of Felt, Part VIII: Make a Mobile

Today's How-To is an expansion of my What to Do With Scraps of Felt Part VII: Make a Festive Garland. It starts with strands of felt shapes weighted by jingle bells and attaches them to a simple frame to create a mobile.
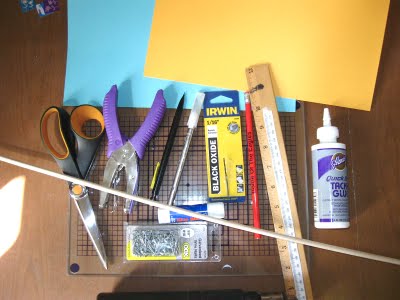
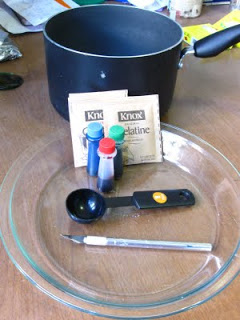
Materials


  • Scraps of felt
  • Fishing line
  • Scissors
  • Glue
  • Jingle bells
  • 20 gauge brass wire
  • Needle-nose pliers
  • Wire cutter (most needle-nose pliers are also wire-cutters)
  • Flat-nose pliers

Steps

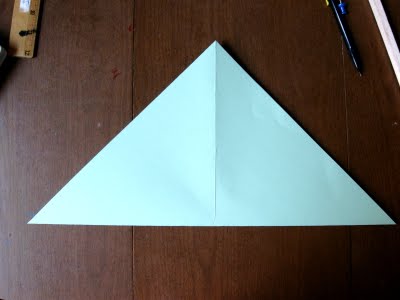
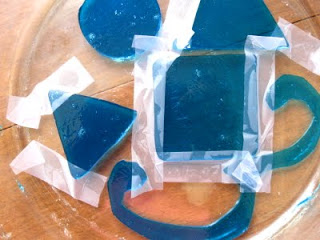
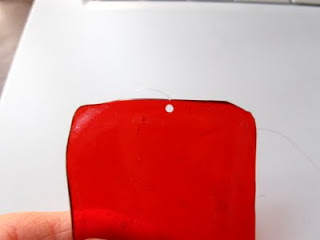
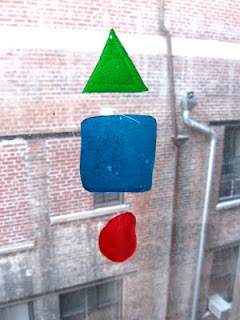
Follow the directions in my previous post to create three or four strands of felt shapes weighted at one of their ends with large jingle bells, but make them shorter than you would a garland; for example, 3-4 shapes per strand.

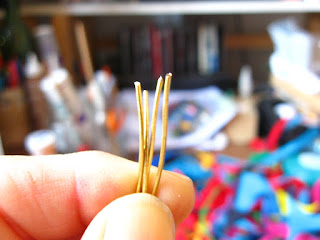
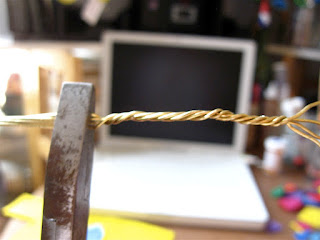
Next, cut a length of brass wire about 9 inches long for each strand of felt shapes. Gather them together in a bunch and twist them together at one end using the flat-nose pliers to hold the bunch still and the needle-nose pliers to do the twisting. Twist the bunch enough times for a length of twisted wire long enough to create a hook or loop. 


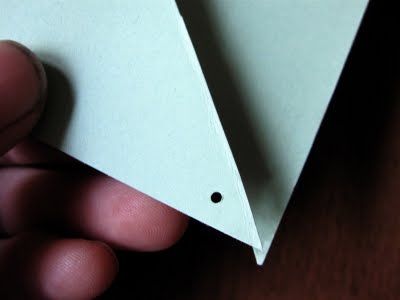
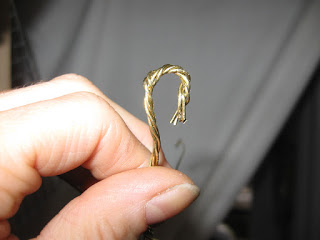
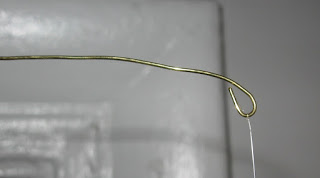
Straighten out the individual pieces of wire and loop them at their ends.


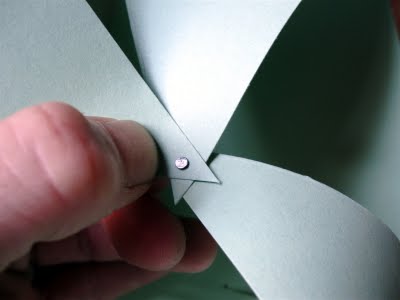
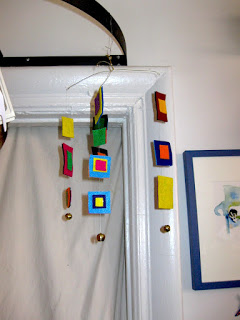
Attach the strands of felt shapes to the loops. Set your brass-wire frame on a level surface so it isn't swinging around while you work. 

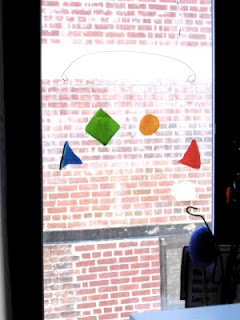
Hang your frame from something stable and adjust the top hook/loop and individual arms of the frame to balance the strands of felt out. (Clearly, my mobile still needs a bit of balancing!)


Stand back and admire your work. Wait for a breeze and watch it come to life.

A few tips
Leave yourself enough length at the top of your strands of felt shapes so as to be able tie them onto the brass-wire frame with ease. 


Enjoy!

Until next time,

Linda

DIY: And all, that, jazz!


This weekend is the Jazz Age Lawn Party on Governor's Island and I couldn't be more excited! Following The Sartorialist's coverage of the event each year, I know I can't take the suggested 20's attire lightly. A quick search of pricing for authentic 20's attire on ebay made me realize this was going to be a DIY project.

beautiful gown decorated with ostrich feathers

After a lot of research on period clothing, I found this absolutely gorgeous dress in the Vogue archives from 1924 that I wanted to replicate. Now, I'm not some amazing seamstress, but I'm pretty crafty so I knew I could come up with something.

I traced the dress on the back of wrapping paper to make a cheap (free!) and easy pattern

You start with a plain tank style dress. I copied a dress that I currently have that has a more straight shape that is in line with the trends of the time. You have to have room in the dress to dance to all that jazz music. I extended the hem a little as you want the hem of the dress to come right to your knees.

pinned on feather fringe!

Find a fringe that is about 5 inches in length. I went with this feather fringe that I found at Mood. If feathers aren't your thing, there are endless trimmings stores in the Fashion District. Pin the fringe around the hem of the dress so it overlaps the bottom just a little bit. Sew (or fabric glue!) the fringe in place. Place another layer of fringe slightly overlapping the first and sew or glue in to place. Repeat with a third layer and you're DONE! Wasn't that easy?


Accessorize with this pretty fascinator from ArtikalNYC, a few strands of pearls, berry lipstick and a 20's appropriate bob and you'll be the belle of the ball! I'll be sure to share some photos from the event on our Facebook page when I'm all dolled up, so be sure to head over an "Like" the {NewNew} so you can see my work in action!

the finished product! I can't wait to wear it!

While you're on Governor's Island, be sure to stop by the Better than Jam Pop-Up and pick up some great {NewNew} goods!

Kelley //

Giant Pinwheel


So, I had this idea to make a pinwheel, but not an everyday ordinary pinwheel (as cute as those may be). No. I wanted to make a really big pinwheel. Just for fun, and for the challenge of it (assuming there's a front-end reason most pinwheels are the sizes they are). And it was a challenge. But the end result was as fun. With the challenge part of it overcome, making them is a snap.

Materials
Don't be daunted! It's a lot but you probably have most of it on hand.

  • Two pieces of 12" x 12" cardstock (only one piece actually needs to be that large; the other can be as much as 1/4 that size)
  • Wood dowel
  • One 18-gauge 5/8" nail (make sure it has a nice head on it)
  • Two pencils, one for marking and one with an eraser you can cut off
  • Small knife
  • Ruler
  • Scissors
  • Glue stick
  • Tacky glue
  • One-sixteenth inch hole punch
  • Drill and 1/16" drill bit
Steps
If you like, cut your dowel down to about half its original length or about 24" (I used the full 48" length). Drill a hole about 1/2" from one end. Set aside.

Cut the eraser off of a pencil (the eraser should be new or only very slightly worn). Set aside.

Fold a piece of cardstock in half diagonally (corner-to-corner) in both directions to create 4 triangles on the surface.


On the fold lines, make a pencil mark about 1/3 of the way from the center. Cut paper along fold lines up to the pencil marks.

Punch a hole in the left corner of each triangle.


Get your nail. Pull the first triangle corner toward the center of the paper and insert the nail point-first from the top.

Pull the second corner toward the center and position below the first corner and over the point of the nail. Repeat until all four corners are on the nail. Push the nail through the center of the paper.


Hold the pinwheel by the nail from the back and gently flatten the triangles a bit. This will make it easier to work with going forward.


Lay the pinwheel face-down so the end of the nail is pointing up.

Fold the other piece of the cardstock in quarters. Cut along fold lines. Take one square and cut the corners off. Apply glue stick to one side and then push it sticky-side down over the point of the nail. Press into place on the back of the pinwheel. (I would actually cut the paper down a bit more than pictured.)


Flip the pinwheel over while holding everything in place. Insert the pointy end of the nail into the hole in the dowel.

Lay the pinwheel face-down again so the dowel is on top with the nail poking through it. Push the cut-off pencil eraser onto the end of the nail. Adjust its position to allow the pinwheel to spin. Set into place with a dab of tacky glue.


Allow to dry, then gently un-flatten the triangles. You may have to bend them forward from their base a bit too. Stick the whole thing into a planter or a vase filled with stones, or affix to anything tall and free-standing (like a lamp) and wait for a light summer breeze to blow by and spin it.

Until next time --

Linda


How to Make Egg Shakers

One of my favorite parts of parenting is inventing strange crafts out of random materials that engage my two kids for the longest amount of time for the least amount of money. The idea for this project came about from broken eggshells. I've been washing and saving eggshells for the last few months to crush and add to my garden as well as to compost. Then I realized that if you keep the two eggs halves they almost fit perfectly back together. Which made me think of the plastic egg shakers that are all the rage during preschool music classes and sing-a-longs. Which made me think what a brilliant idea someone had to make those plastic egg shakers. Which made me think that someone is making a lot of money off of that idea.

And you see how twisted and random my thoughts can be. Sometimes these thoughts turn to something productive, like developing a new hobby (gardening, recycling old clothes into new clothes, composting). Other times... well, let's just say sometimes my time can be better spent sleeping.

Back to the original point of this post, which began with me staring at half broken eggshells and feeling like they could be something more. I loved the way they fit back together after being broken, so I thought we could make real egg shakers minus the plastic. This turned out to be a multi-day process with the drying times factored it, but it was really sort of fun. So here's how to do it.

1. Clean your eggshells thoroughly and lay them out to dry.


2. Fill partially with different dried beans. We used lentils, split peas, and black beans.


3. Apply a thin layer of glue along the rim of the eggshell and fit the other side snugly on top, making sure it matches up perfectly.


4. Let dry for a few hours or overnight.


5. Cut thin strips of newspaper, about .5 inches by 2 inches, for the paper mache. Make a paste from flour and water (boil half a cup of water on the stove and whisk in a heaping tablespoon of flour - simmer lightly for a minute and then let cool). Dip paper in paste or use a paintbrush to apply the paste on the egg and cover the eggs with a few layers of newspaper and paper mache paste.


6. Let dry overnight. (Lay them on the egg cartons and make sure to rotate them so the entire egg dries.)


8. Use poster or acrylic paints to add color to your egg shakers.


9. Do a lesson on color mixing by only starting out with red, yellow, blue and white. Use the egg carton to mix colors (yellow + blue = green, red + blue = purple, red + white = pink, etc). 


10. Paint!


11. Let dry and then let the musicians loose on the shakers! I find the sound of beans on eggshells really soothing and much more pleasant than the plastic variety. Store the egg shakers in the dried out egg carton and also use in food play.


Homemade Polymer Clay

At different points over the last few years I've played around with different kinds of homemade "clay." My favorite is a polymer clay also known as cold porcelain. Its main ingredients are cornstarch and white PVA or Elmer's glue. I like it because it's smooth and a little bit elastic to work with and dries extremely hard. It's also relatively non-porous so it takes paint really well. And it doesn't degrade over time like baker's clay or salt clay does. I've used it to cover blown-out chicken eggs for Christmas ornaments, as well as to make various and sundry bowls, boxes and pendant blanks, among other things.


But it took awhile to get the recipe right. Most of the ones I found online resulted in a compound that was way too sticky to work with. So I experimented with different proportions of glue and cornstarch and the inclusion/exclusion of various secondary ingredients. What follows is the fruit of my experimentation. Lucky you!

Materials
  • 3/4 cup white glue
  • 1 cup cornstarch
  • 2 tablespoons mineral oil (I used baby oil but reportedly even vaseline will work)
  • 1 tablespoon lemon juice
  • Non-stick pot
  • Wooden spoon
Steps
Add cornstarch to glue in a nonstick pot. Mix together and then add mineral oil and lemon juice. Blend well.


Cook over low flame stirring pretty much constantly (you can take a quick break or two if your arm gets tired, which it will) until the mixture resembles mashed potatoes.


Remove from heat! Squirt a little additional mineral oil around the top of your mashed potato mass and with your hands, remove it from the pot. Knead until smooth. It's best to do this while it's still as hot as you can handle.


Pull off a bit to work with and put the rest in a re-sealable plastic bag with the top about half-way open until it's cooled down a bit. Then seal the bag (with as little air in it as you can) and store in the fridge.

Let dry about 2-3 days, then paint, or not.

Until next time --

Enjoy!


Linda

Gelatin Plastic


I first encountered homemade "gelatin plastic" several years ago when I was looking for relatively easy and definitively inexpensive ways of creating art/craft materials for making gifts. Cash and time were extremely tight so shopping for and buying "real" materials (e.g., air-dry clay) was pretty much out of the question. I was limited to what I could concoct from everyday grocery, hardware-store and office-supply items like Elmer's glue, cornstarch, and in this case, gelatin and food coloring. So I found various recipes and how-to's online and adapted them to suit my particular purposes---most of the projects I found were of the "fun rainy-day activities for kids" variety so it was a matter of maximizing the capabilities of the material to make something that an adult could give another adult without anyone being horribly embarrassed. The following modified how-to for gelatin plastic makes for relatively flat, smooth-edged translucent shapes that you can combine into (or use singly as) cheerful sun-catchers.


Materials
  • Three envelopes powdered gelatin
  • 9 tablespoons water
  • Several drops food coloring
  • X-acto knife
  • Flat-bottomed dish (glass is best)
  • Shape templates (optional; not pictured)

Steps
Place the water in a saucepan and sprinkle the gelatin on top. Add food coloring and heat on low flame, stirring pretty much constantly until the gelatin is dissolved. Pour the mixture into a flat-bottomed dish and let set---most recipes say for 45 minutes to an hour, but I prefer at least a few hours. The longer set-time makes for less curling as your cut pieces dry.


Once set, cut the gelatin sheet into various shapes and sizes using cardstock templates (if you like) and an X-acto or similar knife---not scissors, as some recipes suggest. Scissors make for a less even edge. Ditto cookie-cutters. The difference becomes obvious once the pieces dry.


I like to leave my cut shapes in the original dish to dry, rather than remove them as most recipes/how-to's instuct. The original adhesion between the gelatin and the surface of the dish seems to help keep the pieces from curling overly much when they're drying. I also like to lightly tape down the edges of my cut pieces to help keep them flat as they dry. I haven't had any luck with the multiple plastic container lids and paper-towel/cheesecloth contraptions that many recipes/tutorials recommend for this purpose. Gelatin is much stronger-willed than that!


Allow your cut pieces to dry for 2-3 days (or more, depending on their thickness), then drill holes for hanging. Most recipes say to make holes for hanging when the pieces are wet, but I think you get a better result if you wait until they're dry. It's hard to predict how large the hole is going to be once the gelatin dries, and the edges can also come out raggedy. Raggedy edges will not do! Embarrassment will ensue!


Hang the pieces on a suction-cup hook and stick on a window. Use fishing line for a "floating-in-air" effect. Wait for the sun to shine through them; be surprised and intensely gratified at how pretty they are!


Until next time --


Linda