How to Make a Checker Set


I've been wanting to make a checkerboard for some time. My older daughter just turned four and is starting to learn how to play games, although we can only do it when my younger daughter (2) is asleep because she likes to collect all the pieces we are playing with and hoard them in her lap. Take a look at the tutorial below, and afterward enjoy the game! (*Note: This tutorial originally posted here.)

How to Make a Checker Set
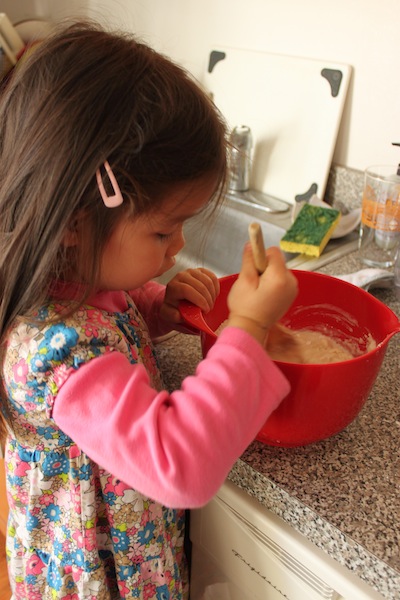
1. First, make handmade clay by combining 2 cups of flour, 1/2 cup of salt, and 3/4 cup of water in a medium mixing bowl. Stir until combined, then knead for 10-15 minutes.

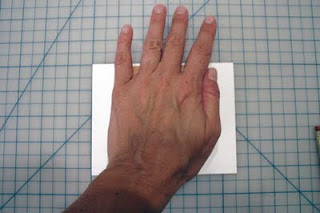
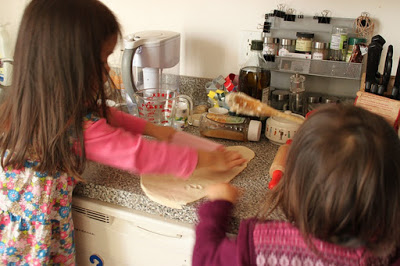
2. Roll the dough out to about 1/4 inches thick.

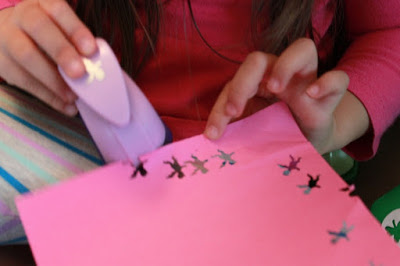
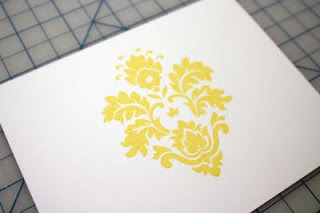
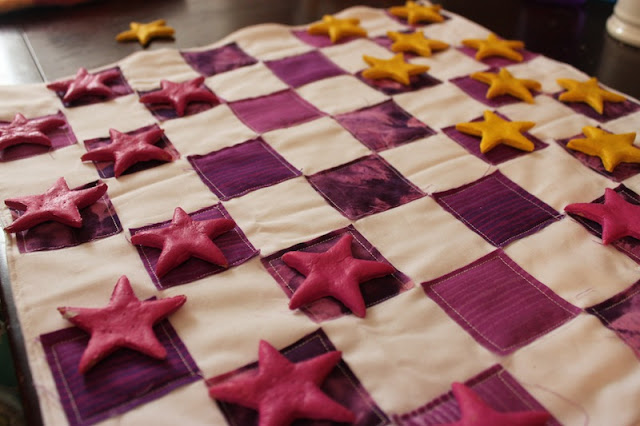
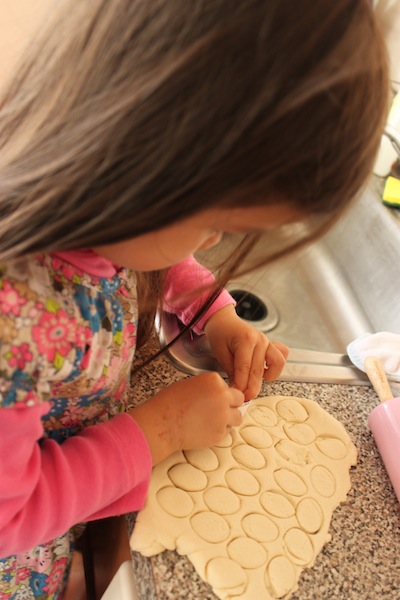
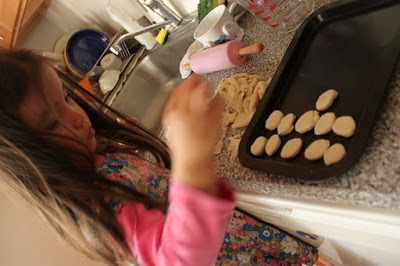
3. Using a cookie cutter, cut out 26 pieces (you will need 12 for each side, but we did two extra just in case some get lost under the couch). We made two sets, one with stars and the other with circles. We made the small circular cutter  by cutting a strip of plastic from an old yogurt container and taping into a small loop.

5. Take shapes out and set on baking sheet with the back facing up. Poke a few holes using a toothpick to prevent the pieces from bubbling up.  Bake in the over at 300 degrees until hard, flipping every 20 minutes. It should take about an hour, but it could take longer depending on how thick your pieces are.

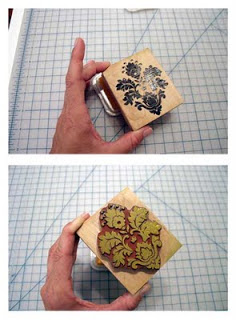
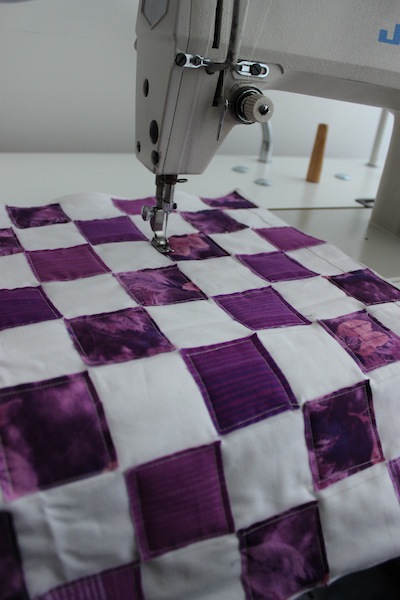
6. While baking, make the checkerboard. I used white fabric as the base, cutting two pieces to 17x17 inches. I also made a square of batting at 16x16 inches. On one side of one piece of white fabric, I used a ruler and a fabric pencil to draw out a board. First I drew lines 1/2 inch in on each side, and then used those lines as a starting point to draw 2x2 inch squares. That should give you eight rows of squares across and eight rows of squares up and down; sixty-four squares total. Then I cut out thirty-two 2x2 inch squares of colored fabric. I used my sewing machine to sew the colored fabric in a checkerboard pattern, making sure to line the pieces up with the lines I had drawn. Once I sewed all the squares in place, I put the two white fabrics with right sides facing in (so the fabric squares are facing in toward the other piece of white fabric) and then put the batting on top. I stitched all around the three pieces of fabric (two white pieces of fabric and one piece of batting) using a 1/2 inch seam allowance, leaving a 2 inch gap at the end. I turned the piece inside out so the batting was tucked on the inside and the checkerboard pattern was facing out. I pressed the seams flat, then sewed around the entire board again. 

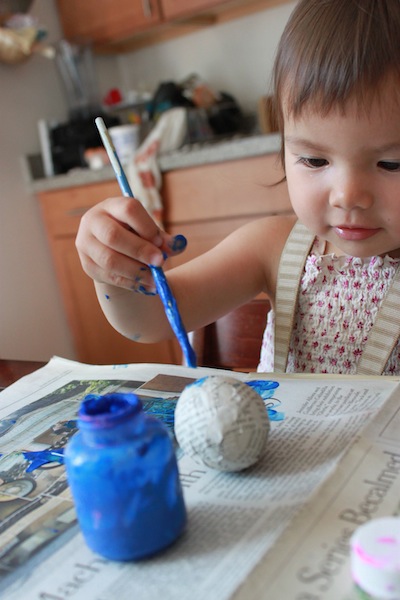
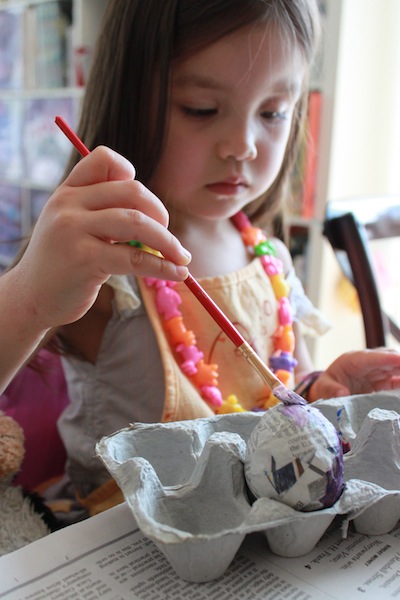
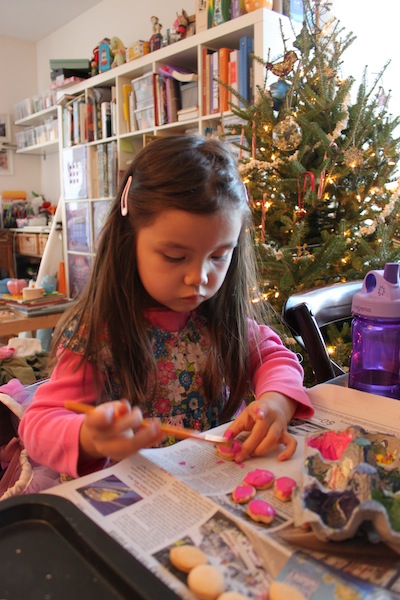
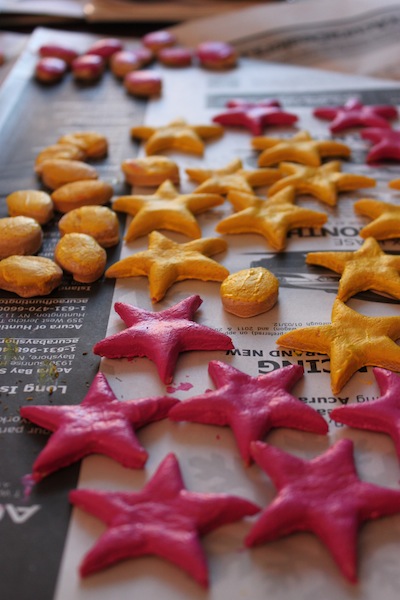
7. Back to the checker pieces! Once they are out of the oven and cool, paint them using acrylic or poster paints. Paint 12 (or thirteen in our case) in one color and the other 12 in a contrasting color. Kaela painted her round pieces and I painted the star pieces. 

8. Let dry completely.

9. Get ready to play!

I found a useful set of simple checker rules at this website, although I'm sure if you dig around you will find other great resources. Enjoy!


Karina
Windows of Agate

Ice Cream! Get Your Ice Cream!

There is nothing better than a nice, delicious, ice cream cone in the summer. Or the autumn. Or really, anytime. Last week, my two daughters and I decided to make fake ice cream to include in our food play; read more to find out how we did it.

My father gave my kids a set of ten shaped hole punchers, which they LOVE... We made plenty of paper punches, some of which we used later in this art project, most of which were eaten by the vacuum cleaner.


Next we cut up egg cartons and painted them in pleasing, ice cream-like colors.


We named the different flavors as we painted twelve of these "ice cream scoops", and added some "sprinkles" from the hole punches. Flavors included strawberry lemony goodness, green flavor with pink cupid sprinkles, and purple grape yum yum.


The ice cream scoops were then set on the windowsill to dry while I cut some manila folders to act as the cones. The dimensions I used were 10 inches at the widest point and 6 inches at the tallest point. Then I wrapped the paper into conical shapes and taped them together. I would suggest that grown ups do this party, since it involves sharp tools.


Phase one complete!


But to be a proper ice cream vendor, you need some place to store your cones where they don't fall over and drip ice cream all over your clothes, so I used this small packing box to create a little stand. I just cut circles into the box for the cones to rest in, and added a little rectangular area to store extra ice cream scoops. Then I poked holes in the side and threaded a ribbon so the girls could wear the box and sell their very delicious ice cream.


We ended up painting the ice cream box using acrylic paints. 


And there you go! Ice cream for all!

Handstamping: A Tutorial

Hello there, New New Blog readers! I'm Kerry - a new contributor here. My Etsy shop is K. Batty Design & Stationery (or kbatty.etsy.com) & it's filled with personalized stationery, custom invitations, greeting cards & a few other paper products coming soon. Many of the items in my shop are hand stamped so I thought I'd kick off with that - a little tutorial on hand stamping with a simple one-stamp greeting card. Heeeeeeere we go...


Supplies: a CLEAN rubber or polymer stamp, a CLEAN ink pad (not something your toddler has been playing with - you know how they are with the paints...), something to stamp on – for this tutorial, as I said, we’re hand-stamping a card, but you could easily personalize notepads, notebooks, gift tags, address labels…you get what I'm saying. You can purchase any of these things at your local craft or stationery store.


Step 1: Prepare your surface – any flat surface will do. Make sure it’s clean - let’s not get the jelly from your morning toast on your project. I like to stamp on my cutting mat..


Step 2: Placement - Decide a head of time where you’re going to place your design. Line up your clean stamp on your paper until you get a design/placement that you like.


Step 3: Ink up! Lightly dab your stamp around the pad. Check your edges for over inking (places where the ink pools in your design or on the stamping block, like that spot on the right side of my stamp. Oops!).


Step 4: Stamp! Use even pressure on the stamp, particularly in the center if it’s a large stamp like this one. Avoid “mashing” the stamp on the paper – the design will look fuzzy & bloated. Oh! This is why I like using my cutting mat. I use the grid to help line up my stamp on the paper.


Step 5: Let it dry! As you stamp, carefully move your pieces aside to dry. Some colors will dry quickly; others take a while, particularly the metallic inks so be patient. Don't smudge it! Also, some surfaces/papers will absorb ink faster than others. Just leave your project on your work surface while you go on to the next step…


Step 6: Clean up! Cover your ink pads first to help keep them from drying out, ensuring a long life for your stamp pad. Wash your stamps & leave them to dry. Usually, I just wash my stamps with water, especially if I get to the sink as soon as I’ve stamped, but it depends on the ink you’re using. Some of it can be a little stubborn, especially if you have been stamping a lot of pieces.


Ta-da! You have a greeting card (or any other paper-product you can dream up)! All you need is an envelope, which can also be stamped if you want. It’s relatively easy & quick but takes some preparation & practice to do it consistently. If you’re a newbie, definitely practice your impression & alignment on a scrap piece before you move to your stamp surface.


Questions or comments? Leave them here & please do report back on what you create! Happy Stamping!

How to Make Egg Shakers

One of my favorite parts of parenting is inventing strange crafts out of random materials that engage my two kids for the longest amount of time for the least amount of money. The idea for this project came about from broken eggshells. I've been washing and saving eggshells for the last few months to crush and add to my garden as well as to compost. Then I realized that if you keep the two eggs halves they almost fit perfectly back together. Which made me think of the plastic egg shakers that are all the rage during preschool music classes and sing-a-longs. Which made me think what a brilliant idea someone had to make those plastic egg shakers. Which made me think that someone is making a lot of money off of that idea.

And you see how twisted and random my thoughts can be. Sometimes these thoughts turn to something productive, like developing a new hobby (gardening, recycling old clothes into new clothes, composting). Other times... well, let's just say sometimes my time can be better spent sleeping.

Back to the original point of this post, which began with me staring at half broken eggshells and feeling like they could be something more. I loved the way they fit back together after being broken, so I thought we could make real egg shakers minus the plastic. This turned out to be a multi-day process with the drying times factored it, but it was really sort of fun. So here's how to do it.

1. Clean your eggshells thoroughly and lay them out to dry.


2. Fill partially with different dried beans. We used lentils, split peas, and black beans.


3. Apply a thin layer of glue along the rim of the eggshell and fit the other side snugly on top, making sure it matches up perfectly.


4. Let dry for a few hours or overnight.


5. Cut thin strips of newspaper, about .5 inches by 2 inches, for the paper mache. Make a paste from flour and water (boil half a cup of water on the stove and whisk in a heaping tablespoon of flour - simmer lightly for a minute and then let cool). Dip paper in paste or use a paintbrush to apply the paste on the egg and cover the eggs with a few layers of newspaper and paper mache paste.


6. Let dry overnight. (Lay them on the egg cartons and make sure to rotate them so the entire egg dries.)


8. Use poster or acrylic paints to add color to your egg shakers.


9. Do a lesson on color mixing by only starting out with red, yellow, blue and white. Use the egg carton to mix colors (yellow + blue = green, red + blue = purple, red + white = pink, etc). 


10. Paint!


11. Let dry and then let the musicians loose on the shakers! I find the sound of beans on eggshells really soothing and much more pleasant than the plastic variety. Store the egg shakers in the dried out egg carton and also use in food play.


Sailor's Knot Bracelet Tutorial

Last year, the lovely Simone from Groundsel posted this great tutorial on sailor's knot bracelets. This Saturday, June 25th, Simone, Pria, and I will be doing demonstrations and helping visitors make their own bracelets at Governors Island. Please join us at House 6B in Nolan Park at Governors Island from 2pm-4pm. While you're there, be sure to take a look around the Better Than Jam Pop-Up Shop at Governors Island, filled with the best handmade goodies by local artisans. See you there!

Supplies you’ll need:
  • 3.5 yards of twine
  • 14 ounce can for a smaller bracelet or a 20 ounce can for a larger bracelet. Any other round object that has the appropriate circumference for your wrist will do.
Directions:
1. Wrap one end of the twine around the can to shape an X. Leave about a 4" tail. You will need this tail at the end to finish the bracelet.
2. Wrap the long end of the twine around the can again and bring it up to the middle of the X. Then pass the long end of the twine under the right, upper leg of the X and pull the long end all the way through.

3. Next, move the upper left leg of the X over the right leg of the X to create an oval shape.

4. Pull the long end of the twine through the oval shaped opening you just set up.

5. Turn the can a bit and you will see that the oval shape has created another X shape. Again, pass the long end of the twine under the right upper leg of the X and pull the end through.
6. Repeat steps 3 through 5 until you get to the beginning of your project.
7. You will now find a three-stranded braid. Follow the twine you initially laid out and create a parallel second line. 
8. Continue around the can. If you find that it's getting too tight to pass the twine through the openings, you may want to take the bracelet off the can and continue with the knotting in your hand. If you take it off, be careful not to pull the twine too tight, otherwise your bracelet will shrink on your wrist. 
9. Continue knotting the rope around the bracelet until each strand of the braid has one parallel line — a total of three passes. At this point you can stop or add another three passes to create the traditional pattern of three parallel lines, like the bracelet in the third picture in this step.
10. To finish, just knot the ends together and weave them into the inside of the bracelet.

Karina

How-To-Tuesdays: Wine Charms

This is one of the first tutorials that I wrote up for Crafty Daisies:

img_9416small.jpg
During one of your recent summer festivities, did you pick up “your” glass and, about to take a sip, discovered that the shade of lipstick on the glass rim didn’t match yours? To avoid such a shocking social faux pas consider spending 10 minutes making some wine charms.
img_9390small.jpg

Materials

  • 4 inch length of copper wire per wine charm
  • Dowel with the same circumference you want the charm to have. I used a broomstick
  • Chain-nose pliers
  • Wire cutters
  • Anything you want to use to embellish the charms (beads, buttons, small hardware)
img_9395small.jpg
With the chain-nose pliers, make a P-shaped loop at the end of the wire.
img_9397small.jpg
Wrap the wire around the dowel to shape a hoop.
img_9400small.jpg
String the embellishments on the wire. These are plastic faceted beads.
img_9401small.jpg
Using the pliers, first bend up the P-loop by 90 degrees. If you hold up the hoop, the loop should be parallel to the table top. Then bend the straight end of the wire up to shape a right angle.
img_9405small.jpg
Trim the end of the straight wire so you can comfortably close the hoop by pushing the end through the P-loop. The whole thing will look like an earring hoop.
charmcollage.jpg
Here are some ideas to decorate the charms. Plunder the hardware store, or your jar of lose bolts and nuts for a more edgy look, or find some cool buttons and string them on wire or thread to attach them to the hoop.

img_9423small.jpg
Here I used ink jet shrink film to print and bake different shapes decorated with these digital papers designed by the talented Bobbi-lee. Check out her blog at tomandjasmine.wordpress.com.


Simone
groundsel.etsy.com