
What to Do with Scraps of Felt, Part II: Make a Groovy Pincushion
If brooches aren't your thing (see What to Do with Scraps of Felt Part I), then something else thing you can do with felt scraps is make a pincushion. This usage employs felt scraps in two ways. First, it rather obviously employs them to make the outer shell of the pincushion, and second, it somewhat less obviously employs them to stuff the pincushion.


The Backstory
One slow Saturday while selling at a local flea market, I decided to use the scraps of felt that had been collecting in my traveling sewing box to make a pincushion (my sewing box was inexplicably without one). Instead of using polyester fiberfill for the stuffing I thought I'd try using other scraps of felt. At the time I hadn't gotten to the bottom of what exactly pincushions were filled with, but I knew it wasn't poly-fill. Too light and bouncy. I knew that felt was dense when you balled it up. Pincushions probably aren't filled with felt, I reasoned, but I bet they could be. So, with the mystery of pincushion stuffing still alive in my mind and an overabundance of felt scraps collecting in my sewing box, I stuffed my little traveling pincushion with felt. It worked great! (Alas, my pincushion has gone missing so I can't include a photo.)
Materials
You will need:
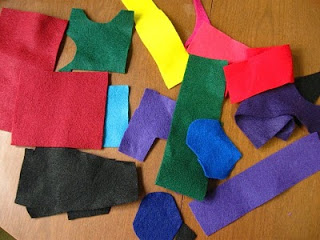
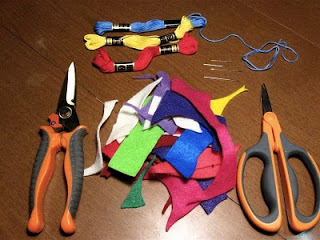
- Scraps of felt
- Thread or embroidery floss
- Scissors
- Pins and needles
Steps
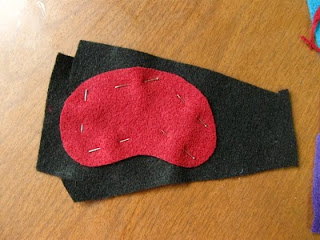
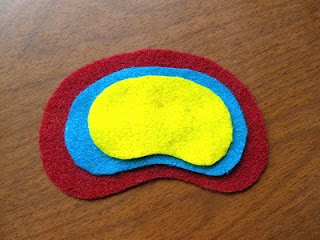
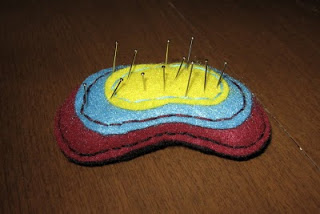
First, find two pieces of felt that are roughly the same size. Cut one of them into a shape and pin it to the other piece, fuzzy sides facing out. Probably subconsciously inspired by the color of my top piece of felt, I cut mine into the shape of a kidney bean. Using the top piece as a template of sorts, cut the bottom piece to match.
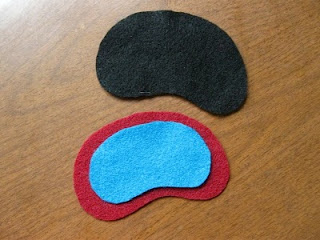
Second (optional), embellish. As noted in Part I, felt is great for layering (and/or appliqueing, which is more or less what layering involves), and having lots and lots of scraps, I stacked a couple of smaller, differently colored kidney bean shapes on top the main one.
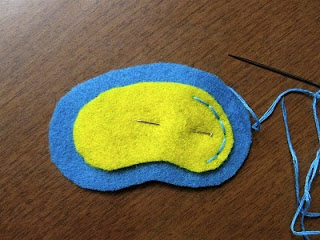
Sew your smaller embellishments first to each other (if stacking), and then to your main piece. You can also use fabric glue to attach your pieces, but if you do, I recommend only applying the glue to the edges of your pieces. Dried glue is difficult to get pins and needles through and will make your pincushion unusable if you use a lot of it.
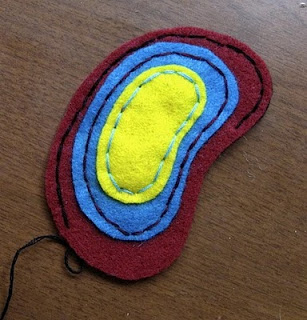
Sew the top piece to the bottom piece. I used a backstitch on mine but a blanket stitch would also be nice. Or you can do what most anyone with a sewing machine would do and just use that. Much faster and easier. I clearly don't have this wonderful device (yet).
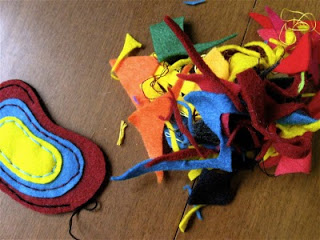
Before going all the way around, stop and stuff with scraps of felt---small ones, bigger ones, whatever. Throw some bits of embroidery floss in there too if you're as neurotic as I am and have any saved that are clearly too short to use.
Sew a bit more, and then stop and stuff again. Keep going like this until your pincushion is nice and firm and you've gone all the way around. Close any remaining opening and ta-da! An entirely re-up-cycled pincushion! Stick pins in it and feel happy.
Until next time --
Linda