
Guest Post: How to Take Better Instagram Photos with your Cameraphone
Phone photography is the way most people snap pictures these days. Gone are the days where you absolutely need a high-quality camera; with your phone you can snap quick photos throughout your day. Many of us put those quick photos on Instagram for sharing with friends and we're all trying to capture the best way to make our photos more interesting and stand out. I want to share some helpful tips that I use for creating better photos with my camera phone for Instagram. Each tip comes with an actionable step so it's not just about reading but also about doing!
1. Find a well exposed spot. In simple terms, exposure = how light or dark your photo is. Exposure will make or break your photo and at times it can kind of seem daunting. At it’s core, it really isn’t so I’ll try to stay away from the technical speak. Photographs that are too bright or washed out (think of those college days photos where everyone is squinting their eyes because of the flash and you can’t tell where you face starts and the white wall behind you ends) reside on the “over exposed” end of the spectrum. Photographs that are dark and grainy veer more towards the “underexposed” end of the spectrum.
Because creative freedom is important, don’t necessarily think of one of these being right and the other being wrong. Just use it as a barometer (kind of like knowing the rules just so you can break them). Below I give you the general steps on how to edit or play with the exposure in three different cameras.
- Iphone users: If you have an iphone simply take a finger and press down onto the screen. You should see a yellow box appear along with a yellow sun on a line. Hold that sun icon down while sliding it up and down the line--you’ll notice that the image on your screen will either get darker or lighter.
- Android users: while I currently own an iphone, I’ve used both Samsung & Sony phones at length and if you poke around the settings in your camera app you will most likely come across a sliding scale with the letters “EV”. This controls the exposure.
- VSCO camera: Tap the screen with two fingers and you will see two red circles pop up--one for Focus and one for Exposure. Move the exposure circle to the part of the image that you want to correctly expose for.
Action Step: Walk around your house snapping pictures of things while playing with the exposure. Take note of the room you're in, your location relative to the light source (light bulb or window) and how that affects the exposure. What do you like better? Dark moodier images or those that have an abundance of light?
2. Use your grid to help with composition. Some people might find this helpful while some will find that they function better without it. While I don’t always use it, I do know that when I have it turned on I’m much more intentional about the images I’m composing.
Action Step: Turn on the grid on your phone and use it to help with your composition. Do you find it helpful or prefer it off?
3. Don’t be self conscious. This is for those of us that love photographing in public...but also kind of hate it. Just walking by the streets and seeing something we want to snap a picture of but deciding not to do it because we’re worried about what others will think. Trust me, I’ve been there so many times--I’m still there a lot of times! But I hate the feeling of regret and I always feel better when I suck it up and take the time to take my photograph properly.
Action Step: The next time you go out make it your goal to stop and take at least one picture when you feel compelled to. (at least one!)

4. Variation. Never just take one photo and assume that it’ll be the perfect picture. I can’t explain to you how important it is to not only do several takes (because often times that first take is not perfect) but to also do variations of the same shot. Sometimes we forget that we can actually move with our camera phones in our hands and take an image in different angles. The end result will leave you with images that you might not have even initially set out to take but end up loving more than the one you saw in your head!
Action Step: Take 5 different compositions of the one photo subject. Zoom in. Zoom out. Shoot from a lower level. Over head. Move things around in the frame. Just give yourself the freedom to mix it up.

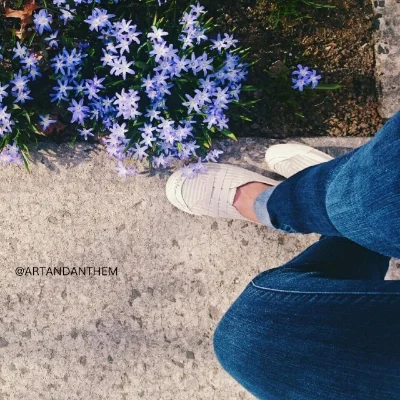
5. Pay attention to the details. One of my favorite things to photograph is just everyday moments. Everyday moments that feel good to us, that means something to us. It could be your child’s hand grabbing for some snacks on the table, or you standing in the kitchen early in the morning with your funky socks on, enjoying a cup of tea in the quiet of the morning. These moments hold beauty and they resonate with people. Don’t forget about them.
Action Step: As you go through your day be more mindful and stay in the moment. If that moment resonates with you and you want to capture it, pull our your smart phone (and use steps 1-4 to help do that moment justice!)

I hope you guys found this helpful! I personally love Instagram, even before I started using it for work related purpose. I find that the best content that can be created is the one that we actually find inspiring. Your feed doesn’t need to look like everyone else’s because your life, your vision, the way you see the world --that doesn’t look like anyone else either. Give yourself the freedom to create and have fun with this. Keep experimenting and practicing and I promise you’ll see improvements :)
About Nadeena (Our Guest Blogger): Nadeena is a visual brand strategist and photographer for creative brands. She resides over at Art & Anthem but you can also chat her up on Instagram (because she seriously lives there).