
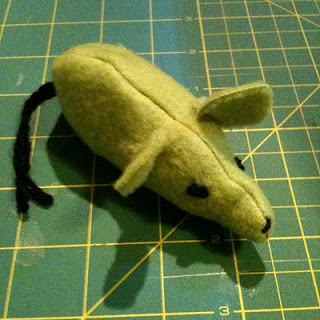
How To: Make An Catnip Mouse

Materials:
a 6x6 inch square of fabric
yarn (for the tail and face)
1/4 cup catnip
thread to match fabric
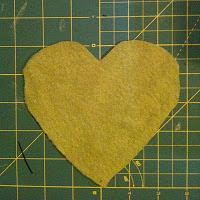 |
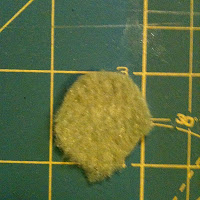
| Fold the fabric in half and cut a half-heart shape on the fold so when you open the fabric, it will look like a heart. |
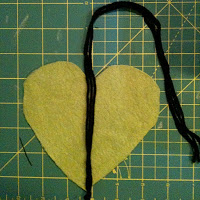 |
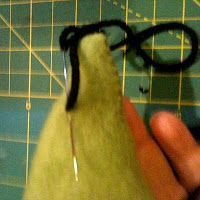
| Cut 3 pieces of yarn about three times the height of the center of the heart. Tie a knot at one end. With the wrong side of the fabric facing you, lay the yarn on the fabric with the knotted end at the bottom point of the heart. |
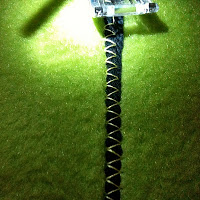 |
| Using a zigzag stitch sew the yarn to the center of the heart. |
 |
| Fold the heart in half with the right side of the fabric facing in. Starting at the point sew a 1/4 inch seam around the heart leaving a 1 inch opening at the end. |
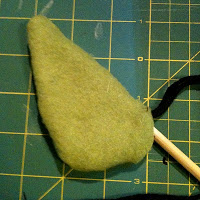 |
| Turn the heart right side out. |
 |
| Using yarn (or embroidery floss) embroider eyes and a nose. Be sure to secure tightly. |
 |
| Cut 2 small circles from remaining fabric (or a different fabric if you like) for the ears. |
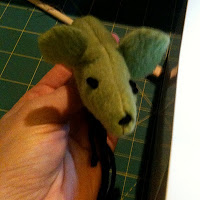 |
| Sew these in place securely by hand. |
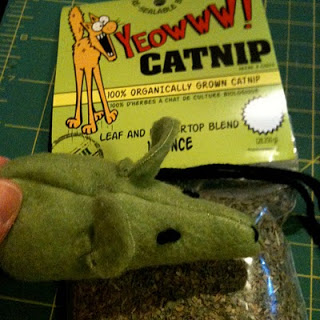 |
| Fill your mouse with the catnip. My cats like Yeowww! an organic brand that is VERY potent. |
 |
| Sew the opening up by hand. Tie a knot at the end of the yarn close to the seam. Braid the 3 pieces of yarn together, tie and cut to form the tail. |
Voila you have a catnip mouse. Why not make some more and donate them to your local pet shelter?
 |
| Holly Ellis Designs |