Tutorial Tuesday: Make an Iron On Embroidery Transfer
This year, I've been busy transforming photographs into embroidered images. My latest project is this building:
 which will soon adorn this bag:
 And here is the process:

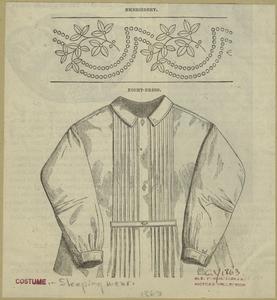
You can use this process to create your own embroidery transfers from photographs, drawings, or kid art, and to refresh vintage iron-on transfers where the ink has dried up. Or create your own designs from antique magazines like this embroidery pattern dated 1863 from Godey's Lady's Book, which you can find at the New York Public Library Digital Gallery.
 Simone
groundsel.etsy.com
 which will soon adorn this bag:
 And here is the process:
Materials

- Reverse image of the picture you want to use
- Tracing paper (You can use ordinary paper, but tracing paper makes it easier to see the image you're tracing.)
- Sulky Iron-On Transfer Pen
- Fabric
- Iron
Process
- Trace your image on tracing paper. It will iron on IN REVERSE. You can use the mirror image setting of your printer to print a reverse image to trace. Once transferred, the image will be correct again.
- Lay the tracing paper on the fabric with the ink side touching the fabric. Use a dry iron (no steam) on a cotton setting and iron the back of the tracing paper.
- Lift up a corner of the paper to check whether the ink transferred.
- Start embroidering.
You can use this process to create your own embroidery transfers from photographs, drawings, or kid art, and to refresh vintage iron-on transfers where the ink has dried up. Or create your own designs from antique magazines like this embroidery pattern dated 1863 from Godey's Lady's Book, which you can find at the New York Public Library Digital Gallery.
 Simone
groundsel.etsy.com


