2011 Holiday Handmade Cavalcade Gift Guide for Him

Here it is, the second in our series of gift guides featuring the work of artisans participating in this year's Holiday Handmade Cavalcade (December 3 at Public Assembly in Williamsburg).
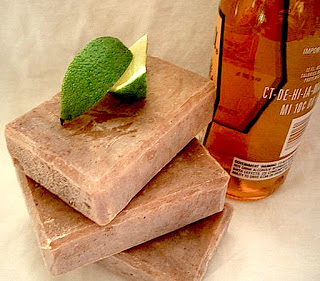
First things first:

Cerveza Con Lima Body Bar by NordeaSoaperie.
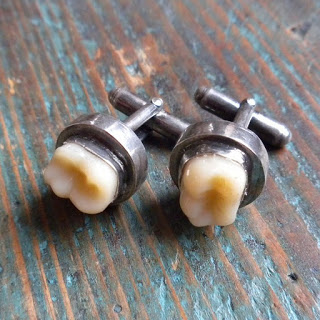


Next:

Sterling Molar Cufflinks by SaruStar.

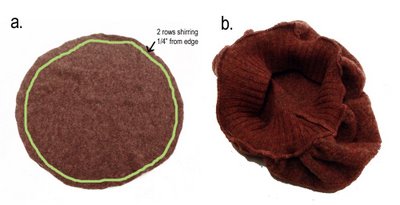
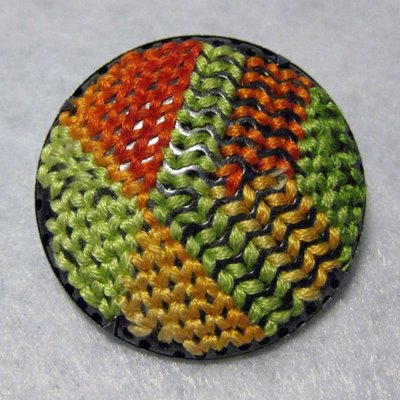
And for outer-wear (although I suppose not necessarily exclusively):

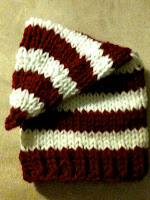
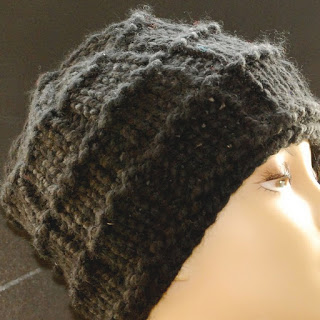
Black Knit Cap for Men or Women by EllisDesign.

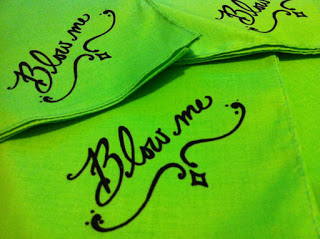
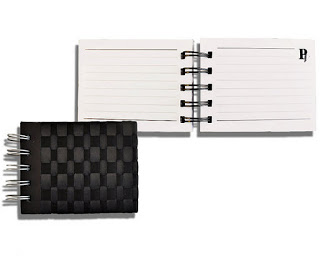
Accompanied by a few essential accouterments (one a bit saucy):

Set of Two Neon Green Hand Screened Handkerchiefs by ApertureAgog

Little Black Book, Mini, Hand Woven in Satin Ribbon by PriaVanda

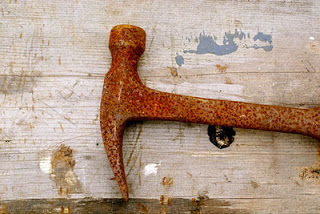
Don't forget his abode! It may benefit from some styling too. A great manly choice for the wall: 

Rusty Hammer 8x10 print by AstrOdub

Come to the Holiday Handmade Cavalcade for more special gifts for the men on your list!

Until next time --


Linda


Easy Peasy Top Down Stocking Cap


This cute cap is one of my favorites to make.  The red and white stripes create a sweet candy cane look but you can choose whatever colors you like.

Size
Newborn to 12 months 
Finished circumference 17 in. (43 cm)
Materials:
1 skein worsted weigh yarn in red
1 skein worsted weight yarn in white
US size 13 double pointed needles (set of 5)
US size 13 16” circular needle (optional)
Stitch marker
Note:
You’ll be using a double strand of yarn for this project. 
Stitch Pattern:
RIGHT LIFTED INCREASE (RLI): Lift first leg of stitch below the next stitch onto needle and knit this stitch.

Directions:
1)    Using 2 of the double pointed needles CAST ON 4 stitches in RED (remember to use 2 strands of yarn together)
2)    SLIDE stitches to opposite side of needle. The yarn should be coming out of the left stitch.   Pull the yarn from behind. *K4. Slide stitches across needle. Repeat from * 2 more times.


3)    DIVIDE stitches evenly on 4 double pointed needles (1 stitch on each needle)
4)    RLI, place marker, k1; RLI, K1; RLI, K1; RLI, K1 (8 st)
5)    WITH WHITE yarn; k 3 rounds even (no increase)
6)    RLI,  k2; RLI, K2; RLI, K2; RLI, K2 (12 st)
7)    WITH RED k 3 rounds even
8)    RLI,  k3; RLI, K3; RLI, K3; RLI, K3 (16 st)
9)    WITH WHITE yarn; k 3 rounds even
10) RLI,  k4; RLI, K4; RLI, K4; RLI, K24 (20 st)
11) WITH RED k 3 rounds even
12) RLI,  k5; RLI, K5; RLI, K5; RLI, K5 (24 st)
13) WITH WHITE yarn; k 3 rounds even
14) RLI,  k6; RLI, K6; RLI, K6; RLI, K6 (28 st)
15) WITH RED k 3 rounds even
16) RLI, k7; RLI, K7; RLI, K7; RLI, K7 (32 st)
17) WITH WHITE yarn; k 3 rounds even
18) RLI,  k9; RLI, K8; RLI, K8; RLI, K8 (36 st)
19) WITH RED k 4 rounds even
20) WITH WHITE k 4 rounds even
21) WITH RED k 4 rounds even
22) WITH WHITE k 4 rounds even
23) WITH RED k 1 round even
24) WITH RED work 4 rounds k1 p1 rib
25) Bind off loosely in pattern and weave in loose ends

(To make this hat to fit larger just simply repeat the increase rounds one or two more times. That's the great thing about top down knitting you can just increase and measure as you go! No swatching necessary)
www.EllisDesigns.etsy.com


Upcycle How-To: Holey Sweater Hats, Batman!

It's a fact that one of the best ways to keep warm is to cover your head. Unfortunately two other things are also usually true by this time in the winter. I've gotten bored with my current hats, and I've managed to ruin one of my favorite sweaters. Here is a simple sewing "How-To" to turn a holey sweater into two fun new hats.

Roughly cut up the sweater into useful pieces for both hats like this:
Now we're ready to start on Hat #1. So far this has been described by onlookers as "Asian-inspired" or "Modified Pillbox," but I figure that a hat by any other name will look as sweet.

Cut your large circle, and two pieces of the 3" band which are each 1/2 of around your head plus 2".

Pin and stitch (using a zig-zag or serger stitch to allow the hat to stretch) with 1" seam allowance at the finished edge diagonally to no seam allowance at the point of the unfinished edge.


This might give a slight point at the seams, so just cut at part off to make an smooth band.Pin band down to round with finished edge facing the center onto your large circle. There will probably be way too much seam allowance on the round, so just cut it off to match the edge of the band. wherever it makes a nice circle. Stitch with just 1/4" seam allowance (again using a zig-zag stitch or serger) around the circle.
Turn it right-side out, and put on your finished hat and show off your eco-friendly handywork.

Let's begin on hat #2. I refer to this style as "Mob Cap," but some others have insisted it's "Chef."

Cut your large circle, and 1 piece for the band which goes around your head plus 1".
Pin and stitch band (using a zig-zag or serger stitch to allow the hat to stretch) with 1/2" seam allowance to make a ring.
Sew 2 rows of shirring (either a large running stitch if by hand, or a straight stitch on the longest stitch length of your sewing machine) around your large circle. Leave long tails to pull the shirring tighter. Pull the threads until the edge of your circle is the same size as the band. Pin into place (wrong sides together, of course), and stitch around with 1/4" seam allowance.
Turn right-side out, and model it for anyone willing to look!

Now that you've finished two hats in the same fabric, you could get a hat accessory that could play double duty. Since my hats are orange, I'm partial to this threaded pin by urbahnika.


Hope you enjoyed this tutorial, and continue to let the NewNew blog keep you warm!

~Kari
http://ikyoto.etsy.com