
Wardrobe Refashion: How-to Make Your Dress Form Look Like You (Only Better)

Although I have a pile of clothes waiting to be refashioned and an equal stack of fabric that could become cute new outfits, first things first. My kick-off project was to tackle getting my dress form ready to roll. Since it is a task that many home sewers might not have a lot of experience with, here is some professional advice to guide you. This process is different from making an exact replica of your body. Instead, this form yields clothing that not only fits, but also flatters.
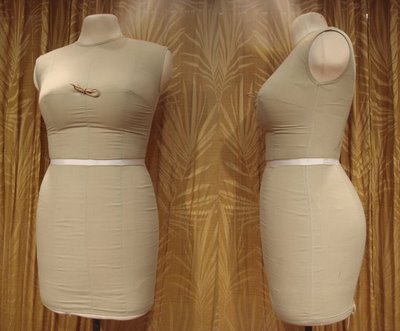 Here is my dress form. Unsurprisingly, it has great proportions and a very standard figure. Very few people in the world will find their measurements to be the same as their dress form, no matter how fabulous we all know we look!
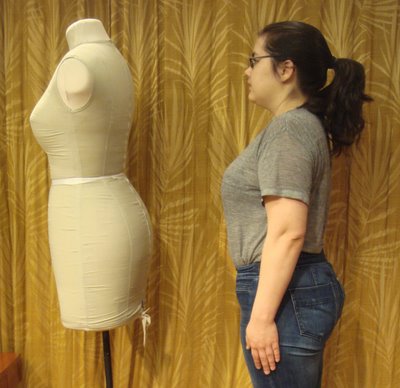 At this point, it is time to make direct comparisons. Take thorough and accurate measurements of your over-bust, bust, under-bust, waist, high and low hip, and those of your form. This is not the part where we flatter ourselves. This process is meaningless without total honesty. Establish where you and the form differ and by how much. In my example, the form and I are the same except for the waist.
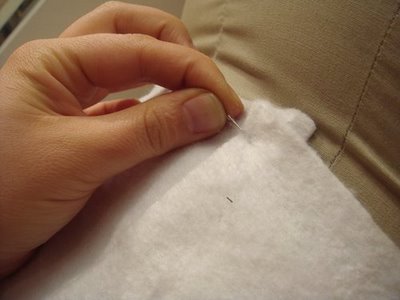 You'll need various forms of padding (e.g. shoulder pads, bust pads, and batting) to pin onto your form. The most effective way to pin them is by using straight pins with the length nearly flat to the form, and the tip pointing towards the center of your pad.
The #1 trick of padding a stand is making the measurements the same as your own, but doing so by putting the extra where you wish it was.
If your bust measurement is bigger, try putting the padding on the breasts. If your hip measurement is bigger, add it to either your butt or sides depending which you think looks more pleasing. Even if you carry most of your extra waist in the front, spread it around to give a more even silhouette.
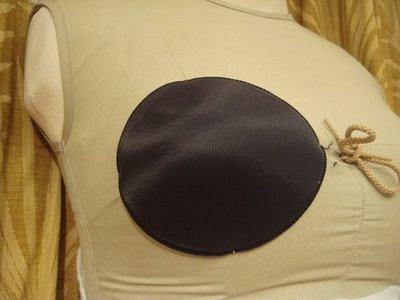 Here is an example with padding added to the breast using a commercial bust pad.
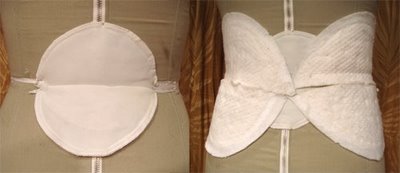
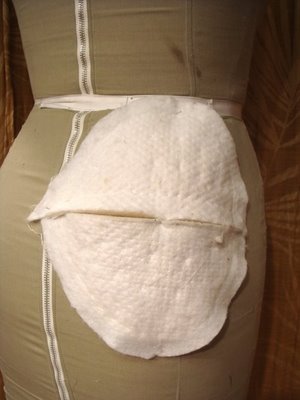 This one is for adding a little extra lift to the butt area to extend the hip measurement using two shoulder pads with flat edges together.
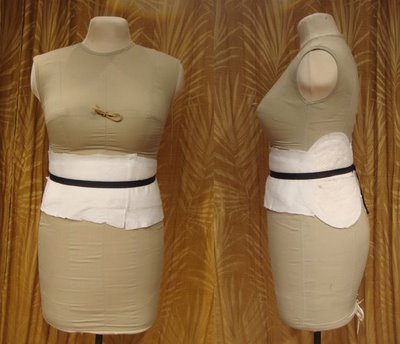
 Here are the steps I took in my own case. First I used two thin shoulder pads in the small of the back. Then two sets of thick shoulder pads to either side. The tapering edges of the pads help smooth out the shape to keep from having big jumps in size.
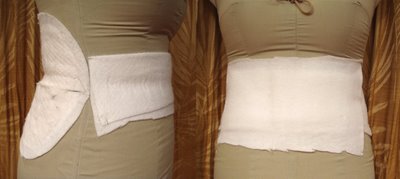 Next I used a folded piece of batting directly in the waistline to help bulk it up more. Then I used a single layer of batting to assure the smooth transition to the rest of the form.
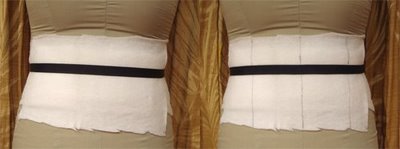 The measurements all matched at this point, so I added a ribbon to mark the new waist. Using a Sharpie, I extended my center front and princess lines onto the padding.
 The form is now precisely my measurements and will make a dress that fits my body. By fudging the placement, the added bonus is any clothes made on this stand will be well proportioned, which ultimately makes me and my projects look even better.
 ~Kari
~Kari
http://ikyoto.etsy.com
Here is my dress form. Unsurprisingly, it has great proportions and a very standard figure. Very few people in the world will find their measurements to be the same as their dress form, no matter how fabulous we all know we look!At this point, it is time to make direct comparisons. Take thorough and accurate measurements of your over-bust, bust, under-bust, waist, high and low hip, and those of your form. This is not the part where we flatter ourselves. This process is meaningless without total honesty. Establish where you and the form differ and by how much. In my example, the form and I are the same except for the waist.You'll need various forms of padding (e.g. shoulder pads, bust pads, and batting) to pin onto your form. The most effective way to pin them is by using straight pins with the length nearly flat to the form, and the tip pointing towards the center of your pad.The #1 trick of padding a stand is making the measurements the same as your own, but doing so by putting the extra where you wish it was.
If your bust measurement is bigger, try putting the padding on the breasts. If your hip measurement is bigger, add it to either your butt or sides depending which you think looks more pleasing. Even if you carry most of your extra waist in the front, spread it around to give a more even silhouette.
Here is an example with padding added to the breast using a commercial bust pad.This one is for adding a little extra lift to the butt area to extend the hip measurement using two shoulder pads with flat edges together.Here are the steps I took in my own case. First I used two thin shoulder pads in the small of the back. Then two sets of thick shoulder pads to either side. The tapering edges of the pads help smooth out the shape to keep from having big jumps in size.Next I used a folded piece of batting directly in the waistline to help bulk it up more. Then I used a single layer of batting to assure the smooth transition to the rest of the form.The measurements all matched at this point, so I added a ribbon to mark the new waist. Using a Sharpie, I extended my center front and princess lines onto the padding.The form is now precisely my measurements and will make a dress that fits my body. By fudging the placement, the added bonus is any clothes made on this stand will be well proportioned, which ultimately makes me and my projects look even better.~Karihttp://ikyoto.etsy.com