August Freebie: Imari Magnet Paperdoll

If you are already familiar with Stephanie Monroe's  work at her shop The HoneyPie Tree, you will easily recognize one of her favorite creations the Imari doll.

Imari Magnet Doll by Stephanie Monroe - The HoneyPie Tree
Here Imari comes to us as a magnet paper doll. You can download her here. Simply print the image on magnetic inkjet sheets and cut out the parts for a quick, fun refrigerator toy. Alternatively, you can use card stock and attach small glue dots to the back of the pieces to easily dress Imari. This could become the perfect surprise toy for a little one for that August roadtrip you planned.

Kayla, Imari and Camille - Miniplush Toys

Stephanie specializes in earth-friendly toys. Handcrafted using 100% wool felt, her many designs include dolls, home decorations and party kits.
Quilted Wall Hanging
If you like her paperdoll, be sure to thank her for her generous gift at her facebook page.
Polka-Dot Party Kit
Simone
groundsel.etsy.com

Quick & Crafty Tuesday w/Sam

My very good friend, Kristyn is planning to move across the country at the end of the year. We have been friends for 15+ years, and I was crushed when she told me the news in March. I knew this day was coming, but secretly hoped the day would never come.

Anyway, as a last hurrah, she signed up to run the NYC marathon in November. A few weeks ago, she sent out a note asking for help watching her daughter while she trained after work.

I was excited for the opportunity for a little "crafty time" with her 5-year-old daughter Sam. So, I went to one of my favorite stores, Michaels for some fun ideas.

I settled on some blank picture frames that we could decorate. I purchased some puffy stickers, metallic flowers, tiny pom-poms, colorful ribbon, glue, and of course glitter! I also printed out a picture that I had taken of Sam when I met them for dinner a few weeks back.

I arrived at their apartment with my bag of crafty goodness. Kristyn had her sneakers on, and off she went, promising us she would be back in about an hour. Sam & I got to work because her frame was going to be a surprise for her mother once she returned home.


I laid out all of the goods, and Sam and I carefully selected our decorations...cutting ribbon, repositioning pom-poms, gluing flowers until we were satisfied with our picture frames. We were saving the glitter (oooh, glitter!!) for last.


We just about finished with the glitter, when Kristyn came back home. "Oh mom...don't look yet!" We still had to put the picture in the frame! So, we quickly put in the photo, and Sam presented the finished project to her mom.


After a lot of "oohs and ahhs" I said my goodbyes and came home. I probably looked a little crazy on the bus, covered in glitter, but satisfied that I was able to spend some quality time with Sam. She seemed to like the ribbon a lot (little pink owls,) so next time we may try to decorate some headbands or hair clips with ribbon (I just have to figure out how!)

Just a quick idea for a fun Tuesday evening of your own...Happy Crafting!

-Nordea
nordeasoaperie

Summertime Crafting

So it's officially summertime in New York City. I love the beach, don't you? Sure I don't live near the beautiful blue water beaches of Puerto Rico or the white sandy beaches of the Bahamas, but I love the ocean nevertheless. The ocean is so restoring and inspiring to me. I remember as a kid I used to love going to the Jersey shore and just staring at the ocean waves. I still do that to this day. And then of course you can walk along the boardwalk and have a beer while the little one devours ice cream cone after ice cream cone.
I've been inspired to do so many crafty things lately! I was at my mother in law's house and saw these cute earrings someone made for her out of sea shells. So that got me thinking about all the fun things you can do with shells.
When you're at the beach it's a good idea to walk along the shore line and just collect little sea shells, rocks and bits of sand glass. It's fun and you can ask your little ones to help!
The first idea I had involved making some sand glass pendants. It's so easy!

These pendants are simply made with some beading wire that's wrapped around it and a loop is made for the chain. Cute, right? And super simple!

A good thing to invest in is a jewelry making drill. Fiskars makes a good one, as pictured below.

This drill is cool because you can use it to drill a hole into the sand glass if you want to. You can decoupage an image onto the glass and then drill a hole for a chain or even make earrings out of it.

Then there are the endless possibilities you will have with sea shells. OMG, seriously. You could probably write a book on all the things that are possible to make with sea shells.

My favorite thing to create is this beautiful wreath! How beautiful.
All you have to do is get yourself a foam wreath and come armed with a glue gun and lots of glue sticks. Then you can simply glue them onto your foam wreath, making sure that everything is covered in shells. Be sure to arrange them in a pretty manner of course, and you can overlap them too.
Awesome!

The Craftaholic
Sweet Buddha Designs

How-To: Gum Wrappers, Mom, and Me

the big one!

When I was a little girl, my mother taught me how to make folded paper chains from gum wrappers. This humble paper craft introduced me to the concept of making something decorative from what would otherwise end up in the trash. It was like learning a magic trick. There was a lot of treasure-from-trash activity going on in the 70s -- my grandmother's crocheted kitchen mat made from plastic bread sacks, my mom's Christmas tree made from spray-painted tuna fish cans! But the gum wrapper chain was my first attempt at upcycling, and it's still my favorite.

We took gum wrapper chains seriously in our house. My mother was the Gumkeeper and Chain Maven that made it all possible. We had a drawer in the kitchen that she always kept stocked with gum and loose wrappers to work on when the mood struck. At the height of our wrapper-folding enterprise, the chain stretched from one end of our house to the other (and beyond!).

Sadly, the chain we made got lost in a move, but I have a chain of my own now, which I started making when I was 17 years old and living away from home for the first time. I was an exchange student living abroad, at times terribly homesick. I'm sure that repeating that same sequence of folds my mother had taught me years before must have helped a little at easing the sadness of being so far away from her and dad.

Here are the instructions for making your own Gum Wrapper Chain. I usually work in stages: tear a big batch of wrappers in half, then fold all the halves into links, then assemble the links at the end.


step 1 step 1b
1. Fold gum wrapper in half lengthwise. Give it a nice, firm crease, then tear wrapper along fold line. Each half-wrapper will eventually become a link in your chain!


step 2 step 3
2. With blank side facing up, fold each half-wrapper in half lengthwise and crease.

3. Open the fold, turn the edges in toward the center crease, and refold. You should be left with a nice thin strip.


step 4 step 5
4. Fold strip in half, forming a large "V."

5. Turn both ends inward toward the center fold. You will now have a link that resembles a small "v."


step 6 finito
6. Now it's time to assemble your little links! Grab two links and insert the tabs of one link through the slots of the other link. Repeat and repeat and repeat until you run out of links. And there you have a gum wrapper chain!

(NOTE: If you're not a gum chewer, you can use other types of paper to make a chain. Skip step 1 and instead cut paper into 1" x 2 5/8" ( 2.5 cm x 6.7cm) pieces, which is the same size as one-half of a wrapper. Also note that paper that is too thin or slick will make chains that are prone to getting twisted and tangled.)


Happy Mother's Day and happy folding!


Lisa H.
parallelbotany.etsy.com

Tutorial: Using Beaded Jacobean Couching to Fill Embroidered Shapes

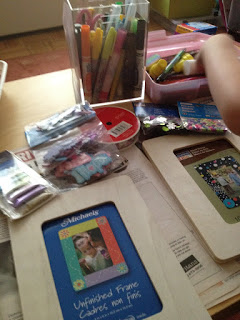
This embroidery technique is a variation on a stitch called "Jacobean Couching" that uses beads to give your project some added elegance. This project is not difficult, though it is helpful to have some knowledge of basic embroidery. Here are the materials you will need:

1. Embroidery Floss.
2. Seed Beads.
3. Regular sewing thread in a color that matches your beads.
4. A heat-transfer pencil.
5. An air-soluble pen (a pen that makes a mark which will disappear in a day or so).
6. A transparent gridded ruler.
PLUS, tracing paper, scissors, a home iron, fabric to embroider your design onto, and an embroidery hoop. For this project I used a 6" hoop.

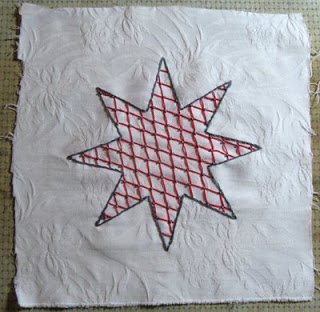
STEP 1: Trace your design onto tracing paper using the heat transfer pencil. I chose an eight pointed star - you can choose pretty much any image you like, as this technique works well for filling any simple shape.

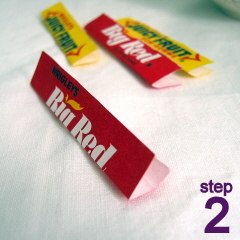
STEP 2: Iron the design onto your fabric. Use the hottest setting that will work for your chosen fabric, turn the steam setting to "off," and do not let your design shift while ironing. My design was transfered after about ten seconds of ironing.

STEP 3: Outline your design using any stitch you like. I chose to use the Stem Stitch, which is illustrated below. For this project, I did my stitching with three strands of embroidery floss. A handy set of illustrations for various outline stitches can be found here.

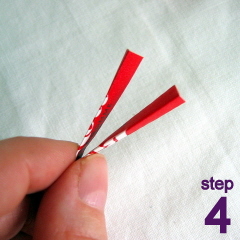
STEP 4: You are going to run a series of parallel threads over the entirety of your design. I chose a distance of 3/8". Using your transparent gridded ruler, make small dots right next to your outline, indicating where your parallel stitches should be placed. The ink should disappear in a day or so, but it's still best to keep your marks as small as possible.

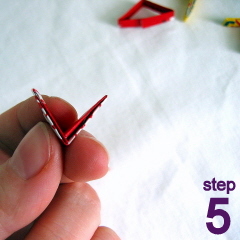
STEP 5: Using the marks you've made, create a series of long parallel stitches that fill up your entire shape.


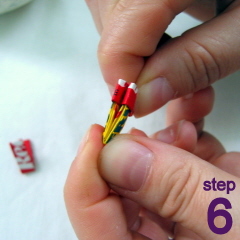
STEP 6: Decide whether you would like to end up with a shape filled with squares or diamonds. If you want squares, you should make your second set of parallel stitches at a 90 degree angle to the first set. I decided I wanted diamonds, so I chose a random angle, and simply made all my stitches parallel to the first line that I made at random.

STEP 7: Once you have filled your entire shape with a grid of long stitches, you can start adding the beads. Thread your needle with a double strand of regular sewing thread, then bring your needle up through the fabric right next to the place where two threads cross.

Thread a bead onto your string, and bring your needle back down through the fabric on the opposite side of the crossed threads.

To make sure your beads are securely stitched onto the fabric, bring your needle back up, and make a second stitch through each bead before moving on to anchor the next intersection of threads. Keep going until you've tacked down all your threads.

STEP 8: Admire the beauty!

Valentine How-To: "Mad Love" Game Book

My partner and I love to do Mad Libs together, and we have gone through many of their books, including the romance one that inspired this Valentine's project.

This "Mad Love" book will be 5.5" x 8.5," so plan your paper accordingly. I made my inner pages in Photoshop, but would have been a little bit easier in a word processing program. For content, I drew from romantic things we both enjoy, such as movie plots with quotes, song lyrics, book passages and old blog posts. Here is an example page:
EternalSunshineExample

I found for movies it was straightforward to use plot synopsis from IMDB, and then include your favorite quote at the end. For song lyrics, don't forget the helpful word type of "rhymes with ...," since non-rhyming lyrics aren't as fun. In addition to your standard parts of speech (e.g. noun, verb, adverb), throw in some that are more specific such as "occupation," "silly word," "place," or "famous people." The ever classic "person in room" should not be overlooked.

For my book I did about 10 pages, but more or less would be cool considering how much time or interest you have.

Next the cover:
Day 5:  "Mad Love" Valentine

This is a blank template for you to fill in as a cover. You can download it directly from my Flickr site here. For the Photoshop savvy, go ahead and use a close-up image (camera phone style super close-ups work great for this) into the green square. For the less computer inclined, try printing out a photo or photocopying one and cutting it to fit in the square and gluing it in place.

Day 5:  "Mad Love" Valentine

Cover your eyeballs with the classic style googly eyes to make it look like the original store bought versions. You can download them on my Flickr, again. If you're only semi-experience with Photoshop, note that once you select the eyeballs and paste them into the image, EDIT > FREE TRANSFORM, is useful in this situation. Again, for the non-computer option, scale your eyeballs up or down and glue onto the faces.

Day 5:  "Mad Love" Valentine

Here is my finished cover. I printed it out on card stock, but if you don't have any, print on regular paper and then glue to something stiffer. At this point I also got all of my interior pages cut down to 5.5" x 8.5," and cut a backing piece of cardboard the same dimensions.

madlovecollatepages

You've done all of the hard parts already, now we just staple the pieces together, like so.

madlovestaple

And I covered the staples and top edge with fabric tape to give it a more polished feel.

"Mad Love" game book

I'm really excited to give this to my Valentine, and I hope that you have fun making some too.

~Kari
http://ikyoto.etsy.com