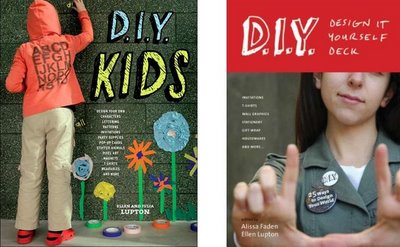
Crafts and Craft Selling for Kids
Crafts & Craft Selling for Kids
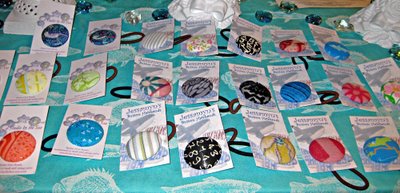
If you are a crafter parent it won’t be long before one of your children asks, “Can I make things to sell too?” Then your quandary is, what can a child make that actually looks good enough to go in your shop or display? Fine craftsmanship is not exactly something your average ten year old is capable of. My daughter tried making pins in felt, which were adorable but were too much work for the price point they would sell at. She tried crochet, but couldn’t master anything beyond a chain. Finally what worked was “Jessamyn’s Button Hairbands,” which consisted of large cloth covered buttons (re-using fabrics from thrift shops) with elastics tied to the shanks on the back. Moreover, making them was a process she could do virtually by herself. I bought the supplies, designed her card, and she pays me back 50 cents for every button she sells. And she does very well--selling them at fairs at a low price point, yet earning enough to be the envy of all her friends.
If you are a crafter parent it won’t be long before one of your children asks, “Can I make things to sell too?” Then your quandary is, what can a child make that actually looks good enough to go in your shop or display? Fine craftsmanship is not exactly something your average ten year old is capable of. My daughter tried making pins in felt, which were adorable but were too much work for the price point they would sell at. She tried crochet, but couldn’t master anything beyond a chain. Finally what worked was “Jessamyn’s Button Hairbands,” which consisted of large cloth covered buttons (re-using fabrics from thrift shops) with elastics tied to the shanks on the back. Moreover, making them was a process she could do virtually by herself. I bought the supplies, designed her card, and she pays me back 50 cents for every button she sells. And she does very well--selling them at fairs at a low price point, yet earning enough to be the envy of all her friends.
Here is another idea for kids wanting to earn their keep, or like mine, to sustain their addiction to Pokemon cards.
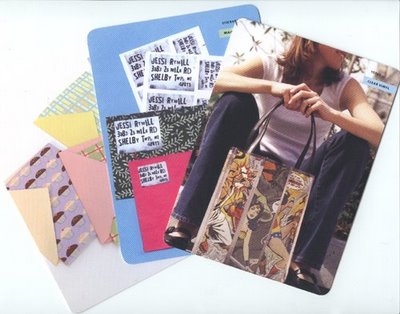
Recycled Bag Tags & Bookmarks
Supplies & Tools:
Old Magazines
Scissors
Glue Stick
Paper Cutter
Mylar or Acetate sheets or any kind of flat, clear plastic
Colored paper (if for business it should be non-fading)
Laminating Sheets
Hole Punch
Plastic Lanyard or other string or yarn
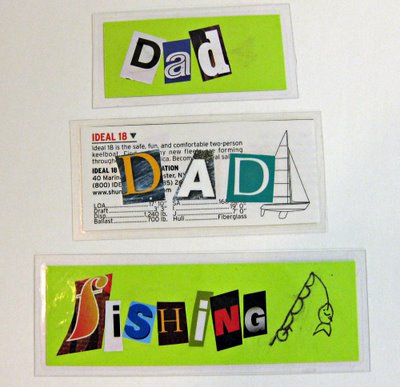
 Let the kids go through the old magazines cutting out all the headlines that are over 3/8” tall. Remember the letters must fit comfortably on a 1.25” strip of paper. If this will be for a “business” they can cut out all the letters individually and put them in marked envelopes for each letter, number, and one for symbols. Some of these headlines were funny enough to use all by themselves, come to think of it.
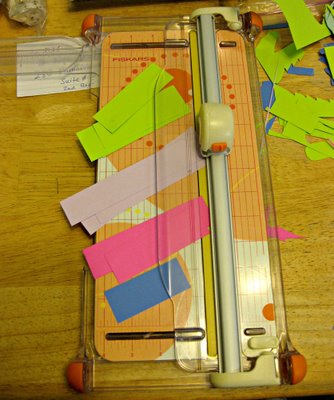
Using the paper cutter, cut 1.25” wide strips of colored paper (I had old scrapbooking paper the kids had been cutting up inefficiently for the last 6 years) or magazine pages with great color or texture for the background. If you don’t have a paper cutter you can use a scissor but the rolling cutter is more efficient and far safer than things like x-acto blades.
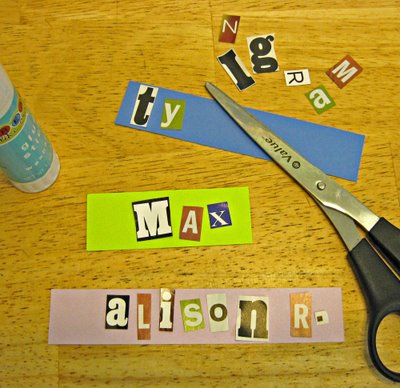 Now they can choose the letters they will use. Names are good, as are cool phrases and sports. Run the glue stick along the length of the strip of colored paper. Arrange the letters and press into the glue. Leave room on one end for a hole if a lanyard will be attached.
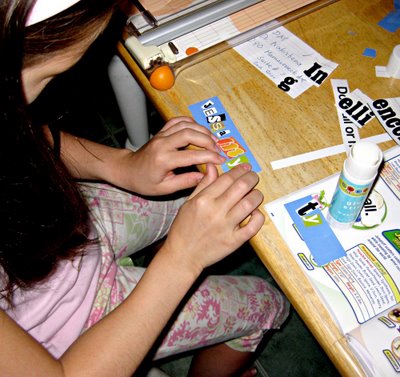
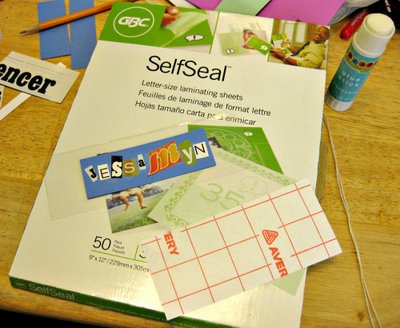 Cut a larger strip of acetate and glue the back of the colored paper onto it, so the tag will have some firmness. (We actually used the heavy plastic from a box of Pokemon cards for the strips, so we felt very virtuous and green.) Cut a strip of laminating paper and use it to carefully seal the front of the tag to the acetate, leaving at least 3/16” extra space all around the colored paper. This is undoubtedly the trickiest part of the whole process and your kids will need some practice to master it. You need to fold back just a corner of the laminating paper and then position it atop the tag. Then you slowly peel off the backing while smoothing it down at the same time, starting from that first corner. With the paper cutter trim the sealed edges. Punch a hole (you will need a good quality hole puncher, like McGill or Fiskars, available at craft stores) in the tag and add a lanyard or string.
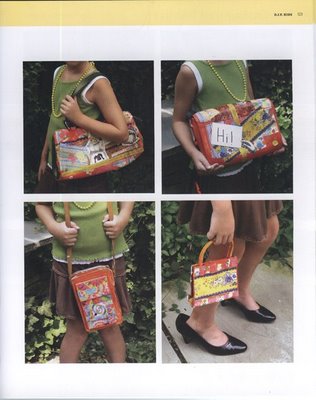
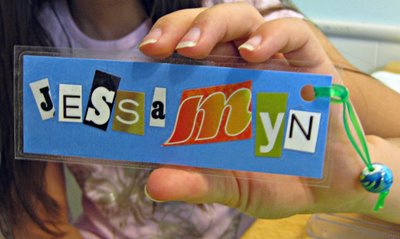 The fun, hip, professional looking results can be used as a bag tag, a book mark, a backpack decoration, a necklace, a party favor, a seating tag, and I've even been thinking, earrings, if you want to work really, really small. The process can be used for children’s parties, school fair fundraisers, for starting your child’s own Etsy Shop, and of course, a few hasty Father’s Day gifts.
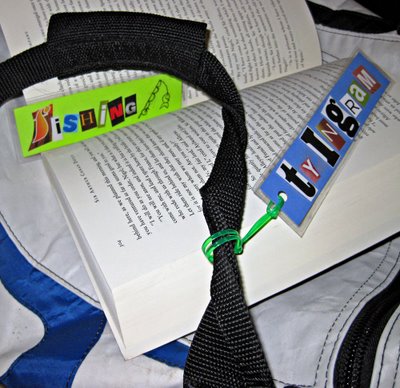
Jody Lee