This post first appeared in March of 2009. Tent weights are such an important item we are running this post once again. Thanks Nordea for this great tutorial. ed
There are many must-haves for vending at an outdoor market. A tent is one of them, especially during the uncertain weather that comes in March and April. New Yorkers got such a surprise last week after waking up to snow on the first day of Spring!
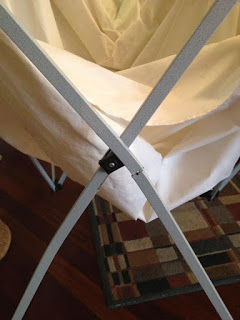
Weighing down the tent is so important. Last year, I used various methods to anchor my tent; including gallon jugs filled with water and free weights. These worked ok, but there were plenty of times I had to stand by one of the legs and hold onto the tent in high winds...instead of tending to my customers. Not to mention the tripping hazard that these posed. Last fall, my tent died (R.I.P. my old friend...) after being blown around all year. I just purchased a new tent for 2009, and decided to build some proper weights to protect my investment.
I read about using pvc piping & cement to make tent weights, and figured I would give it a try. There is a way to figure out how much sand/cement is needed to fill up the pvc piping…something to do w/cubic ft & volume. I am the worst when it comes to math, so I’ll just explain what I did….
Materials you will need:
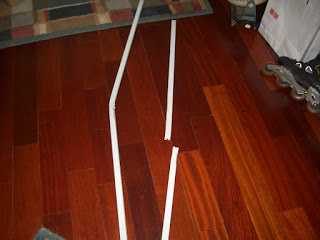
10’- 4” diameter pvc pipe (cut into 4 pieces, 2.5’ long each)
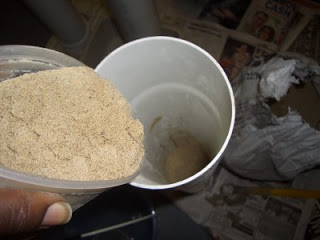
2- 50lb bags of sand
1- 25lb box of quick setting cement
4- end caps for pvc pipe
4- ½” x 8” eye bolt w/nuts
Water
A long spoon or stick to stir the cement (anything you don’t mind throwing away when you are finished.)
Something to scoop sand and cement from the bag (I used an old soup container.)
A hammer
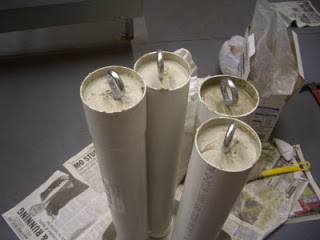
1. Place the cut pipes into the end caps and stand them upright. Make sure they are not crooked and they can stand alone.

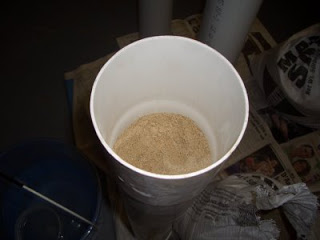
2. Scoop out a bit of cement and pour into the bottom of each pipe.
3. Pour a tiny bit of water into each pipe and stir w/spoon until the cement is a thick consistency. Do this one at a time because it sets up fast, so finish mixing water into one pipe before moving onto the next.
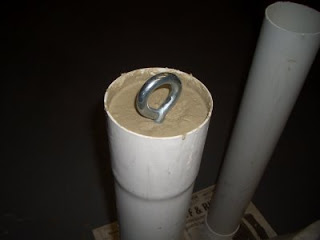
4. Wait a few minutes until the cement starts to set up, then fill up pipe #1 with the sand, leaving room to top off the pipe w/cement. You can measure this by holding the eyebolt over the pipe to estimate the amount of cement needed to cover it.
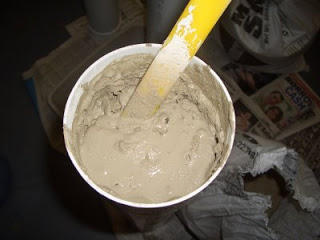
5. Finish filling the pipe by adding cement and water, a little bit at a time, gently mixing until the pipe is full.
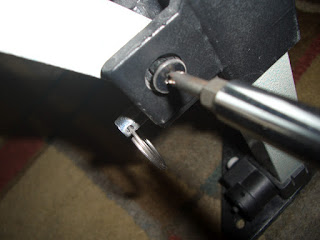
6. Have at least 2 nuts on the eyebolt (you want to give the cement something to “grab” on to) and space them apart on the bolt.
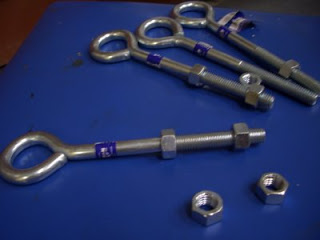
7. Stick the eyebolt into the wet cement, using the hammer to gently push the bolt into the pipe.
8. Repeat steps until you have finished filling all 4 pipes.
9. Set the pipes in a secure location (where they won’t get knocked over) so they can completely harden.
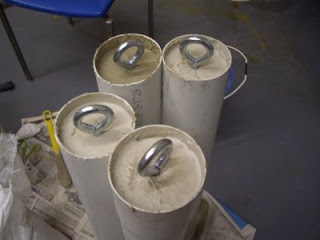
The next day I weighed each pipe, and they averaged about 22lbs each. Of course, if you want heavier weights, just cut the pipes longer (but not too long, that they won’t fit in your car!)
I had approx 40lbs of sand left over when I finished. When in doubt, just buy extra so you don’t come up short (wet cement won't wait for you to return from the hardware store!)
I plan to use a bungee cord to hang the weights from the top frame of the tent on each corner (attached to the eyebolt.) Additional bungees can be used to secure the weights to the legs of the tent keeping them out of the way. These weights can be decorated to make them a bit more attractive. Painting stripes, flowers, and other designs on the weights can add to the charm of your entire display.
All materials cost me approx $45, and knowing that I have taken steps to protect my brand new tent is priceless!!
-Nordea
Nordea's Soaperie