A Quilt for Elias

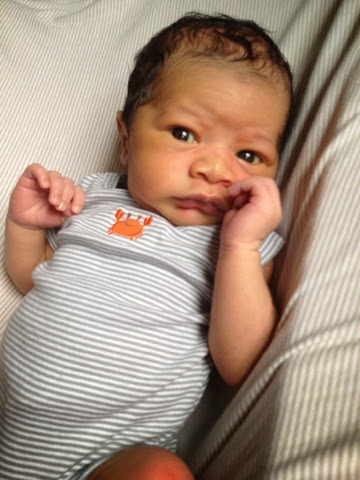
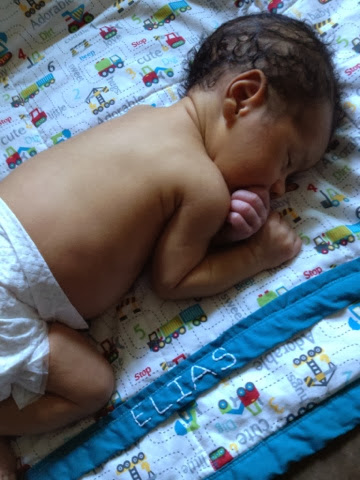
My brother has two little boys, and when the first one was born, I knitted a blanket for him. He was born in late March, so I had plenty of time to knit this blanket. I am not the best knitter, so it took quite a while to finish. My second nephew was born in late June...right in the middle of crafty season (the picture above was taken when he was 5 days old...he was awake and ready to meet me!) I was busy making soap, lotions, etc., so knitting a blanket was not possible. Just not enough time to get it done, so I decided to make a quilt. This is not really a tutorial, but more of an inspiration for you to try something new. If I can do it...anyone can!

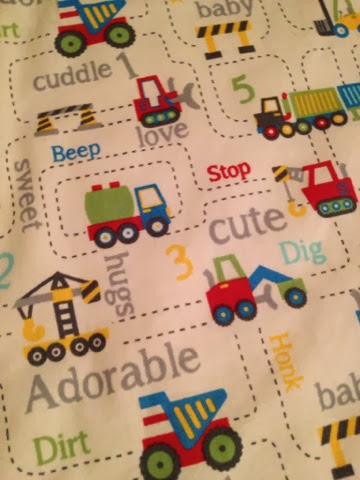
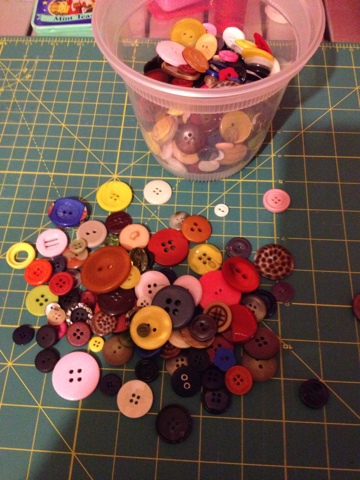
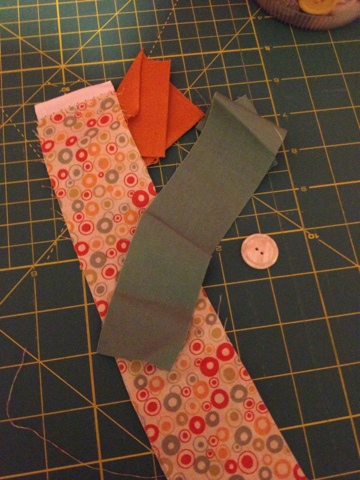
I have never made a quilt before, but I was determined to make a nice keepsake for my little nephew. I scoured the internet, and found some basic instructions. Traditionally, quilts are made with different squares of fabric pieced together. But, for my first try, I decided to keep things simple. I purchased 4 yards of a colorful fabric and another 1/2 yard for the trim, I also purchased some crib size quilt batting.

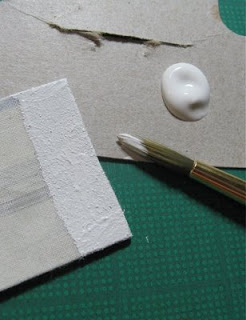
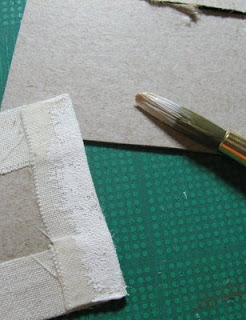
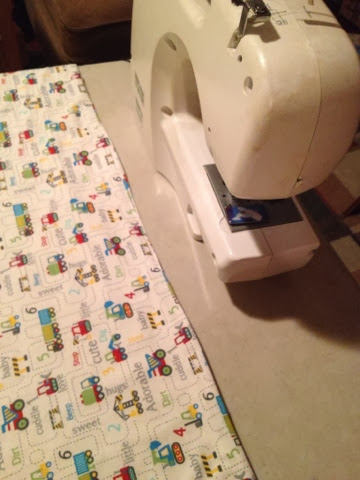
First I cut and measured the fabric and batting, then pinned them together (right sides facing each other.) I sewed them together and turned the fabric right side out. I passed a light iron over the whole thing to smooth out any wrinkles.

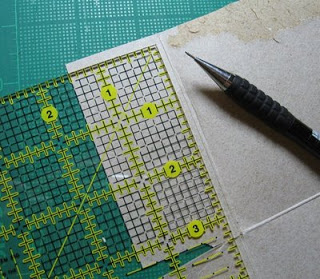
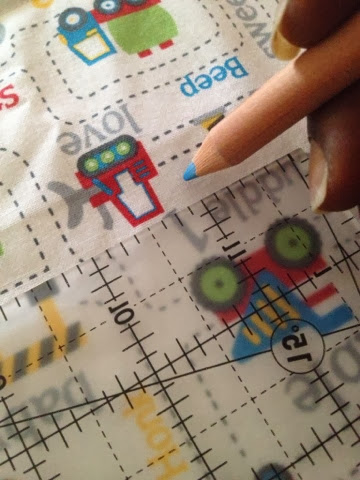
After I had everything assembled, and sewed up all edges, I used a fabric pencil and marked off 12" sections. I then ran the whole thing under the sewing machine to "create" the quilting. I must admit, the lines were very wonky, but not that noticeable.

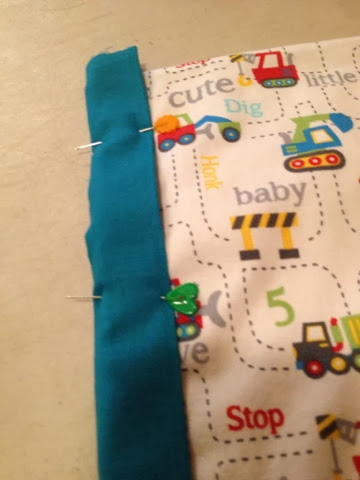
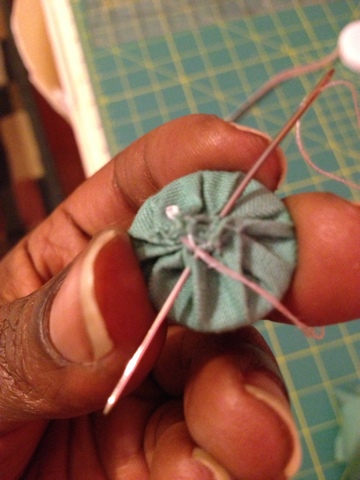
Using a bias tape maker, I made a 2" trim for all 4 edges of the blanket. I pinned the trim in place, and sewed three of them in place.

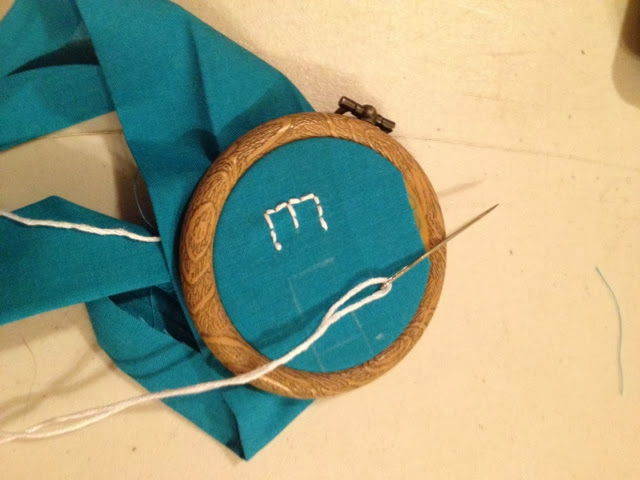
Before sewing on the last piece of trim, I decided to embroider his name on it....just to personalize it a bit more.

Here it is....the finished quilt. I was able to give him the blanket when he was two weeks old. I was so proud of my efforts! Maybe with the next quilt, I will get a bit more fancy, and try to piece different squares together.

Until next time....happy crafting!

Nordea

nordeasoaperie

When Crafting Seems Too Much Like Hard Work

On New Year's morning I was recovering from helping my daughter run three big holiday markets, or partially recovering because the last day of one market was still five excruciatingly long days into the future. Exhausted, I watched all the What Happened in 2013 television shows, had coffee, and went through my email, only to find that YouTube sent videos they (it?) thought I would enjoy. One was from Look TV entitled "Velvet Jewelry Box: Look DIY." 

"Tis the season for gift giving!" the blurb read.

"A little velvet and sparkly buttons turn a cigar box into a luxe holiday gift for your best friend or the jewelry lover in your life. Follow this Look DIY stop-motion tutorial to learn how to repurpose a cigar box into a jewelry box. We're obsessed!"

Step 1 of the box.

Here is the video… (http://youtu.be/yD-YIaIvjkU)

I don't watch too many online videos, unless it's the baby in the car seat dancing to Gangnam Style, or Jimmy Fallon parodying Downton Abbey. I don't watch instructional videos.

But "Velvet Jewelry Box: Look DIY" was amazing. It does not feature someone talking, just a Charlie Chaplin-like video (on fast forward, it seems) of two anonymous hands accomplishing the craft, at breakneck speed. When the model uses scissors, the sound track dubs in a scissors-cutting-noise. It showed every step of how to make a jewelry box and really even a monkey could follow it. 

Being the mother of someone who sells jewelry for a living, there is no box big enough to hold even the very few pieces of jewelry I keep for myself from my daughter's line. Add to that sentimental pieces, and investment pieces (Chanel from ebay) which must be kept in the box they came in for authentication, and a cigar-sized jewelry box is out of the question. 

Many, many steps. 

Watching the video took 3 minutes and 48 seconds, but there were so many steps and they happened so fast, it seemed like making just one box could really take the better part of an afternoon. 

There was the matter of getting all the materials together, which included the cigar box, a yard of velvet (oh, and going to the store to get that velvet), plus 4 sparkly buttons. I had those. One compact mirror (that’s a trip to Michael’s. Is there a Michael’s in NYC?) Plus cardboard, a needle and thread, quilting batting (another store), a ruler, scissors, marker, scrap paper and tape.

As the video unfolded, the box made itself before your very eyes, but the stop-motion animation went by so fast it wore me out; all I could think about was going back to bed.

The blurb ended with the words "What other DIY projects do you want to see from Look? Comment below!"

DominicanBeauty34, the only viewer to take the bait, got right to the point, one that I had not overlooked but was willing to take on faith.

"But why would we have a cigar box?" she asked.

All of those trips to Michael's and the fabric store would be in vain if we could not find the once-ubiquitous-but-now-rarely-available staple of DIY, the discarded cigar box. 

"If we can only make this with a cigar box," she went on, "then it's pretty much useless. It's cute, but useless for people who don't smoke."

She had a point. And how many girls who love cute jewelry boxes also smoke cigars? I walked into the bedroom, got back into bed, and pulled the covers up over my head.

Susan Spedalle

wink and flip

Fabric Covered Buttons

As you can see, I've got a lot of buttons in my stash. Unfortunately, sometimes none of them will work for a particular crafty project I may be working on. Last September, I decided to finally replace a missing button on a jacket. I headed down to a button store in the garment district and ended up buying a button for $3. Yes, $3 for one button. I found the price to be ridiculous, but I had no choice. A few months later, I came across instructions online to create fabric covered buttons....so I will never pay $3 for a button again!

First, pull out your stash of fabric scraps. It doesn't take a lot of fabric, so there is probably something in the fabric stash that will be useful. I decided to use the greenish-colored fabric (seafoam) because I had no buttons that matched the fabric.

Measure the distance from the edge of the button to the middle of the button. You want the fabric to be able to reach the middle so you can completely cover the button.

I traced a circle on the fabric around the button, making sure that there was at least 1/2 inch extra all around.

Then, I cut the fabric. My measurements were pretty close, but it wasn't necessary to be exact.

Taking a needle and thread, I used a running stitch (I think that's what it's called) and stitched along the perimeter of the fabric circle.

After placing the button in the middle of the fabric circle, pull the thread taut so the fabric gathers around the button and covers it completely.

You can even trim a bit of the fabric around the outside of the stitches to reduce the amount of bulk behind the button. You don't want too much fabric because you want the button to lay as flat as possible when you use it.

Continue to stitch up the fabric until it is taut around the button. Knot off the thread, and you are done! A beautiful button for whatever project you are working on!

Until next time....happy crafting!

Nordea nordeasoaperie

A Weekend Celebration of Culture and Crafts

Memorial Day weekend officially kicks of the start of summer…yay! There will be a mass exodus to the beaches, and plenty of grilling. It is also the start of the Dance Africa festival at the Brooklyn Academy of Music: A cultural celebration of dance in Africa and its diaspora.

It is the nation’s first festival devoted to African Dance, and one of the largest in the United States. This year is a special anniversary, celebrating 35 years, with special performances and appearances by Dance Africa’s creator and founder, Chuck Davis.

In addition to all of the special performances, the streets outside of BAM will be transformed into a colorful outdoor bazaar. Over 300 vendors from all over the world will descend upon Brooklyn with their creative wares for sale. Ethnic jewelry, artwork, musical instruments, tubs of shea butter….you name it. There will also be plenty of food stands dishing up fabulous African, Caribbean, and African-American food.

The outdoor bazaar will be located along Ashland Place, between Hanson Place and Fulton Street.
Sat, May 26, 12noon—10pm Sun, May 27, 12noon—8pm Mon, May 28, 12noon—8pm.

-Nordea
nordeasoaperie

Romantic Wedding Favors

Seventeen years ago my husband and I had, apart from the keg of beer and some catered Chinese food, a completely Handmade Wedding. We had very little money but plenty of friends and relatives ready to help us out, and since I lived at the General Theological Seminary in Chelsea, a completely gorgeous spot to get married in. So I gave myself a year to complete all the tasks, which included designing and sewing the dresses for myself and the bridesmaids, making the cake, the flowers, the invites, the decorations and of course, the wedding favors.

I first looked for a nearby ceramics studio, and inquired to see if they would fire a box load of flat hearts for me and what sort of clay I needed to order. I am not in the ceramic arts, apart from taking a few high school classes, but I know that different studios use different kinds of clay and fire them at different temperatures. You don't want to get porcelain clay if the people with the kiln never fire anything that high.

I then ordered a 50lb. bag of white clay and proceeded to roll out the clay just like you would for cookies, only I had two wooden strips about 3/8" high on either side of the clay so the rolling pin would rest on them and all the hearts would be the same thickness. I then used a heart shaped cookie cutter to cut out the hearts. I poked out a hole from front to back with a pencil, and used a small damp sponge to clean up the edges on the back, and any imperfections left by my fingernails. Clay shrinks in the drying and firing so take that into account. I let them dry on newspaper for a few days, and then took them to the ceramics studio to be fired.

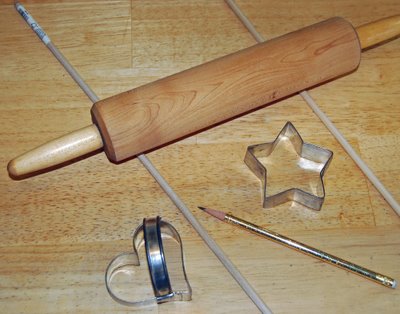
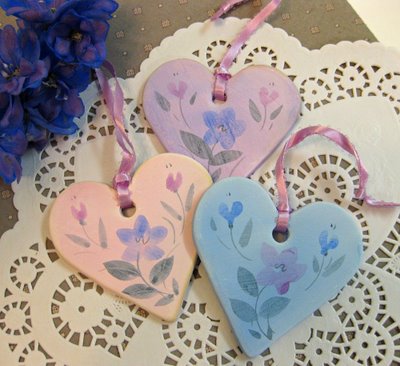
When I got them back I had no intention of dealing with glazes and a second firing, for as I said before, I had more time than money. Instead I dipped them in a very, very watery acrylic bath. I mixed up three colors with my acrylic paints: white, magenta, and a little red for the warm pink, phthalocyanine blue and white for the sky blue, and ultramarine blue, magenta, and white for the lavender. I then slowly mixed in more and more water so that each was more like colored water than paint. Using my fingers, I dipped each heart in one of the colored waters and then put it on wax paper to dry, though I think I would use tweezers or tongs to do it today. It makes for a very pleasant soft watercolor effect and the 300 hearts were done in no time.

I painted the flowers on the hearts in relatively simple shapes, using just these two kinds of brushes, a synthetic #1 round and a #8 or #10 round. The flowers and color scheme matched the wedding party and the flowers I had painted on the bridesmaid dresses. It is important, when using acrylics in this manner, not to use the colors straight out of the tubes or too thickly. My paint is always in a consistency somewhere between olive oil and water. If you are not handy with brushes, practice on paper first, and work with the pointy end of the bristle to make sharp points to the leaves or petals. The leaves may look like one brush stroke, but in fact require two to three strokes to make those shapes.

One friend painstakingly wrote our names and the date of our wedding on the back while another tied on the ribbons, and our nieces handed out the favors to our guests. Many of my friends and relatives still have them!

I think today there are many different air-drying clays you could use instead of actual pottery clay. They are available at art stores and online suppliers and would require a little research. There is certainly a greater variety of cookie cutters! You are sure to find a shape with special meaning for the special couple. For an experienced crafter this is a fun way to handmake a wedding favor that your friends will keep and remember.

How-To: Making a Miniature Artist's Canvas

I have always been obsessed with creating miniature versions of the things I use in my everyday life. I think the extra focus required to make miniature objects imbues the tiny things I make with a special quality--as if they are more charged with meaning than they would be at their regular size. Another reason to spend your time making tiny stuff is that it doesn't take up a whole lot of space, which, if you have friends who live in small apartments and want to give them beautiful handmade things but don't want to burden them with a lot of clutter, is a very good thing!

This tutorial will teach you how to make dollhouse-sized blank artists' canvases from empty tissue, granola bar and cereal boxes, which you can then paint and add to friends' art collections. I am hoping I can spark a whole trendy miniature painting craze!

Here's what you will need:
-empty boxes made from thin cardboard that you otherwise would have tossed into the recycling
-muslin fabric
-white glue
-acrylic gesso
-a normal size brush for applying the gesso, plus teeny tiny ones for doing the actual painting
-acrylic paints
-a gridded acrylic ruler is helpful for making accurate right angles when cutting up your boxes

Step 1: Figure out what size you want your miniature canvas to be. You can just eyeball the size if you like, but if you want it to be the perfect size to fit into a dollhouse, you'll want to do a little math. The standard size for dollhouse accessories is 1/12 scale, which means that you want to divide all your regular measurements by 12. If the full-sized painting would be 18 by 24 inches, then you want to make your mini canvas 1 and 1/2 inches by 2 inches.


Step 2: Once you have cut your cardboard to size, spread it with a thin layer of white glue and stick it to a piece of muslin. Make sure that the sides of your canvas are parallel to the grain of the fabric.


Step 3: Fold the fabric around to the back of the canvas and glue it down.


Make sure the folded fabric edge is glued slightly inside the edges of the cardboard so it can't be seen from the front.


Step 4: When your glue has dried, paint your canvas with a thin layer of acrylic gesso. You want to make sure not to put the gesso on too thickly, because being able to see the grain of your muslin is crucial to having a miniature painting that looks like the full-sized version. If you want to have an especially texture-y canvas, try different types of fabric and see which one looks best.


Paint gesso on the edges & back as well.


That's it! These miniature canvases are so easy and fun to make that you can create hundreds of them in nearly no time, then invite some friends over to have a painting party.


Then you and your friends can have a miniature art show:


Stella (lookcloselypress)