Since the advent of the
{NewNew} Treasure Chest on Governors Island, my daughters and I have taken a few trips on the Governors Island ferry to drop off product and work at the store. My older daughter (2.5 years old) loves the ferry - her only regret is that the boat ride is too short! She was so enraptured by the boat that she is now pretending that everything is a boat - she swings her legs off her bed into the "ocean" and sits in shipping boxes that she calls her ferry. I decided she needed a fun activity to do on her sailing adventures.
It is very easy to made a simple fishing pole and fabric fish. I used one magnet at the end of the fishing line and one at the mouth of the fish so my daughter can catch fish and take them off of the line.
1. First, you'll want to draw a pattern of a fish onto paper or cardstock.
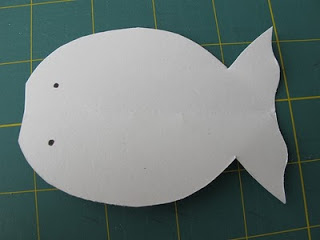
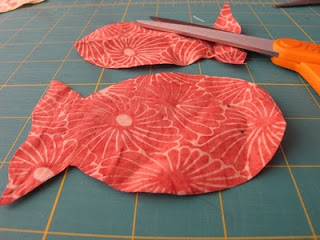
2. Next, trace the pattern onto fabric and mark where the eyes will go.
3. Sew eyes using thread or yarn. You can also cut eye shapes out of felt or use buttons.
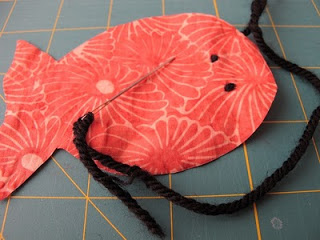
4. With right sides together, sew along the edges of the fish with a 1/4" seam allowance. Leave one part unsewn and turn inside out. Insert magnet at the fish mouth, stuff lightly, and sew closed.
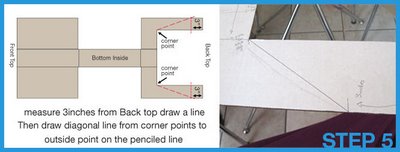
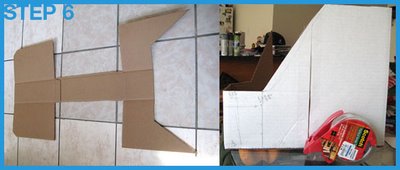
5. For the fishing pole, I put a magnet in the middle of a triangular piece of fabric, brought up all the edges, and stitched the sides and top together, capturing the magnet inside the fabric. Make sure the magnets are positioned so that positive meets with negative so they will attract instead of repel. I tied a big knot at the end of the fishing pole string and put the knot inside the fabric before sewing up the top. That way the line is held securely inside the fabric wrapped magnet.

6. Wrap and tie the end of the string to the fishing pole. You can use a stick, twig, or chopstick for the fishing pole.
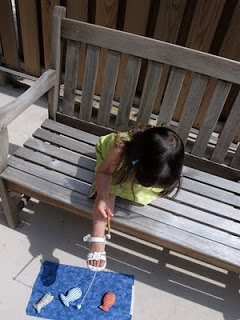
This activity is great for building coordination in young children! Before giving my daughter this new toy, I read her "Curious George Flies a Kite" because the story has a part about Curious George observing a man fishing and then trying to fish for himself. I think this helped her understand how fishing works since we live in NYC and have never gone fishing ourselves!
I put a piece of blue fabric down as a "lake" for the fish. You can also make a bucket using an old yogurt container, punching two holes on each side, and tying a piece of stiff string through the holes as a handle. This also acts as a nice storage case for the fish and pole. Now enjoy a lazy afternoon fishing!
Karina
* Please note that magnets and buttons are choking hazards!


 Seventeen years ago my husband and I had, apart from the keg of beer and some catered Chinese food, a completely Handmade Wedding. We had very little money but plenty of friends and relatives ready to help us out, and since I lived at the General Theological Seminary in Chelsea, a completely gorgeous spot to get married in. So I gave myself a year to complete all the tasks, which included designing and sewing the dresses for myself and the bridesmaids, making the cake, the flowers, the invites, the decorations and of course, the wedding favors.
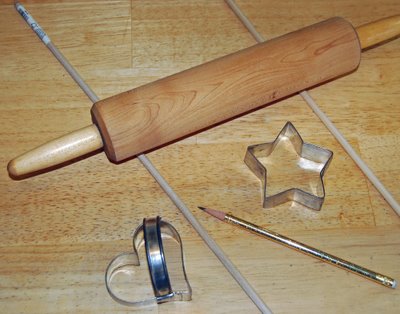
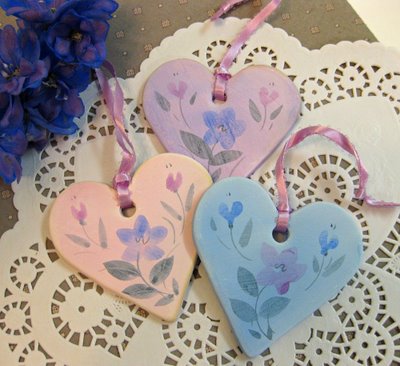
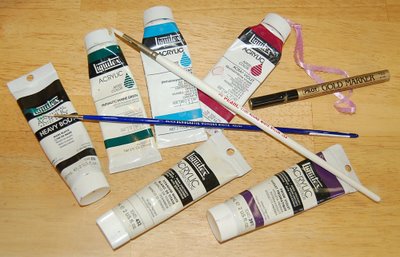 When I got them back I had no intention of dealing with glazes and a second firing, for as I said before, I had more time than money. Instead I dipped them in a very, very watery acrylic bath. I mixed up three colors with my acrylic paints: white, magenta, and a little red for the warm pink, phthalocyanine blue and white for the sky blue, and ultramarine blue, magenta, and white for the lavender. I then slowly mixed in more and more water so that each was more like colored water than paint. Using my fingers, I dipped each heart in one of the colored waters and then put it on wax paper to dry, though I think I would use tweezers or tongs to do it today. It makes for a very pleasant soft watercolor effect and the 300 hearts were done in no time.
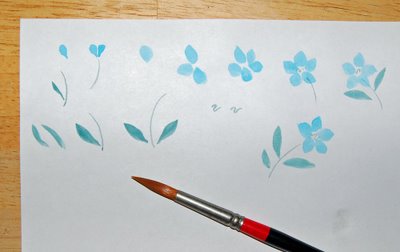 One friend painstakingly wrote our names and the date of our wedding on the back while another tied on the ribbons, and our nieces handed out the favors to our guests. Many of my friends and relatives still have them!
 I think today there are many different air-drying clays you could use instead of actual pottery clay. They are available at art stores and online suppliers and would require a little research. There is certainly a greater variety of cookie cutters! You are sure to find a shape with special meaning for the special couple. For an experienced crafter this is a fun way to handmake a wedding favor that your friends will keep and remember.