Went to Bali and Made a Bracelet

While in beautiful Ubud Bali last month I discovered the Pondok Pekak Library & Learning Center which offers private classes in traditional Balinese art & culture to travelers.

A list of classes can be found on their website http://www.pondokpekaklibrary.com/classes

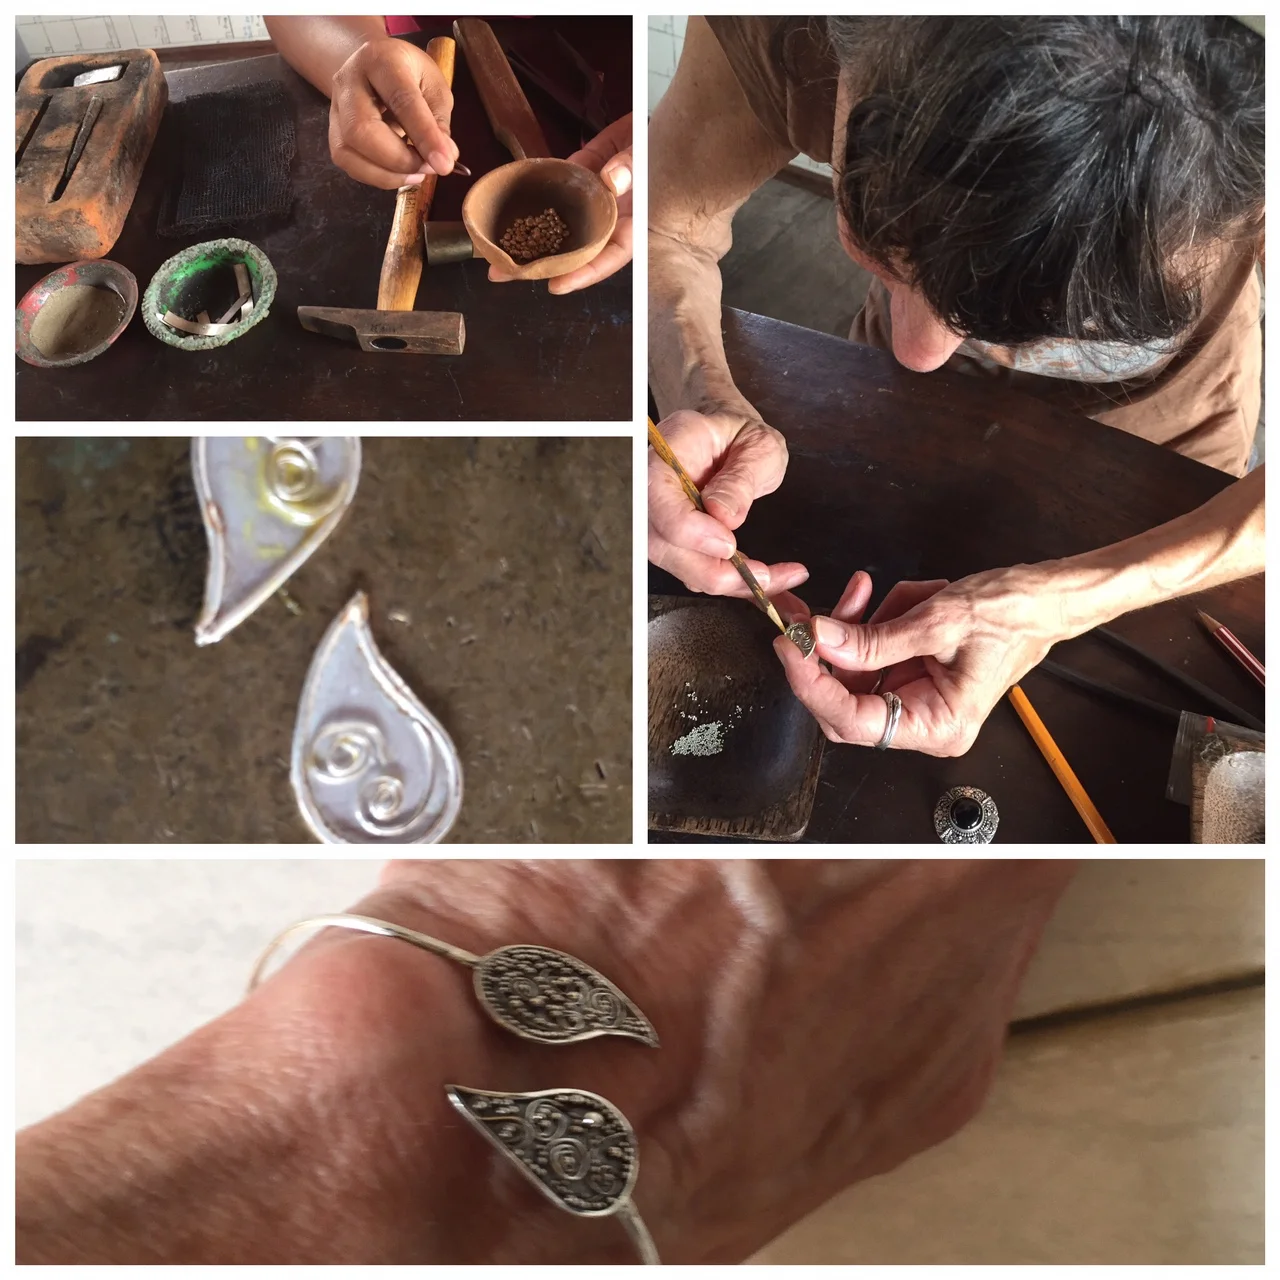
I decided on the Silver jewelry making class although fruit and vegetable carving sounded fun. The teacher was from a close by town that specialized in jewelry making. After deciding on a bracelet design I went to work.

The tools were handmade and were really comfortable to work with. The torch ran on petrol and was kept going by pumping a bellows.

Demo of using the torch. A real challenge for the uncoordinated (me)

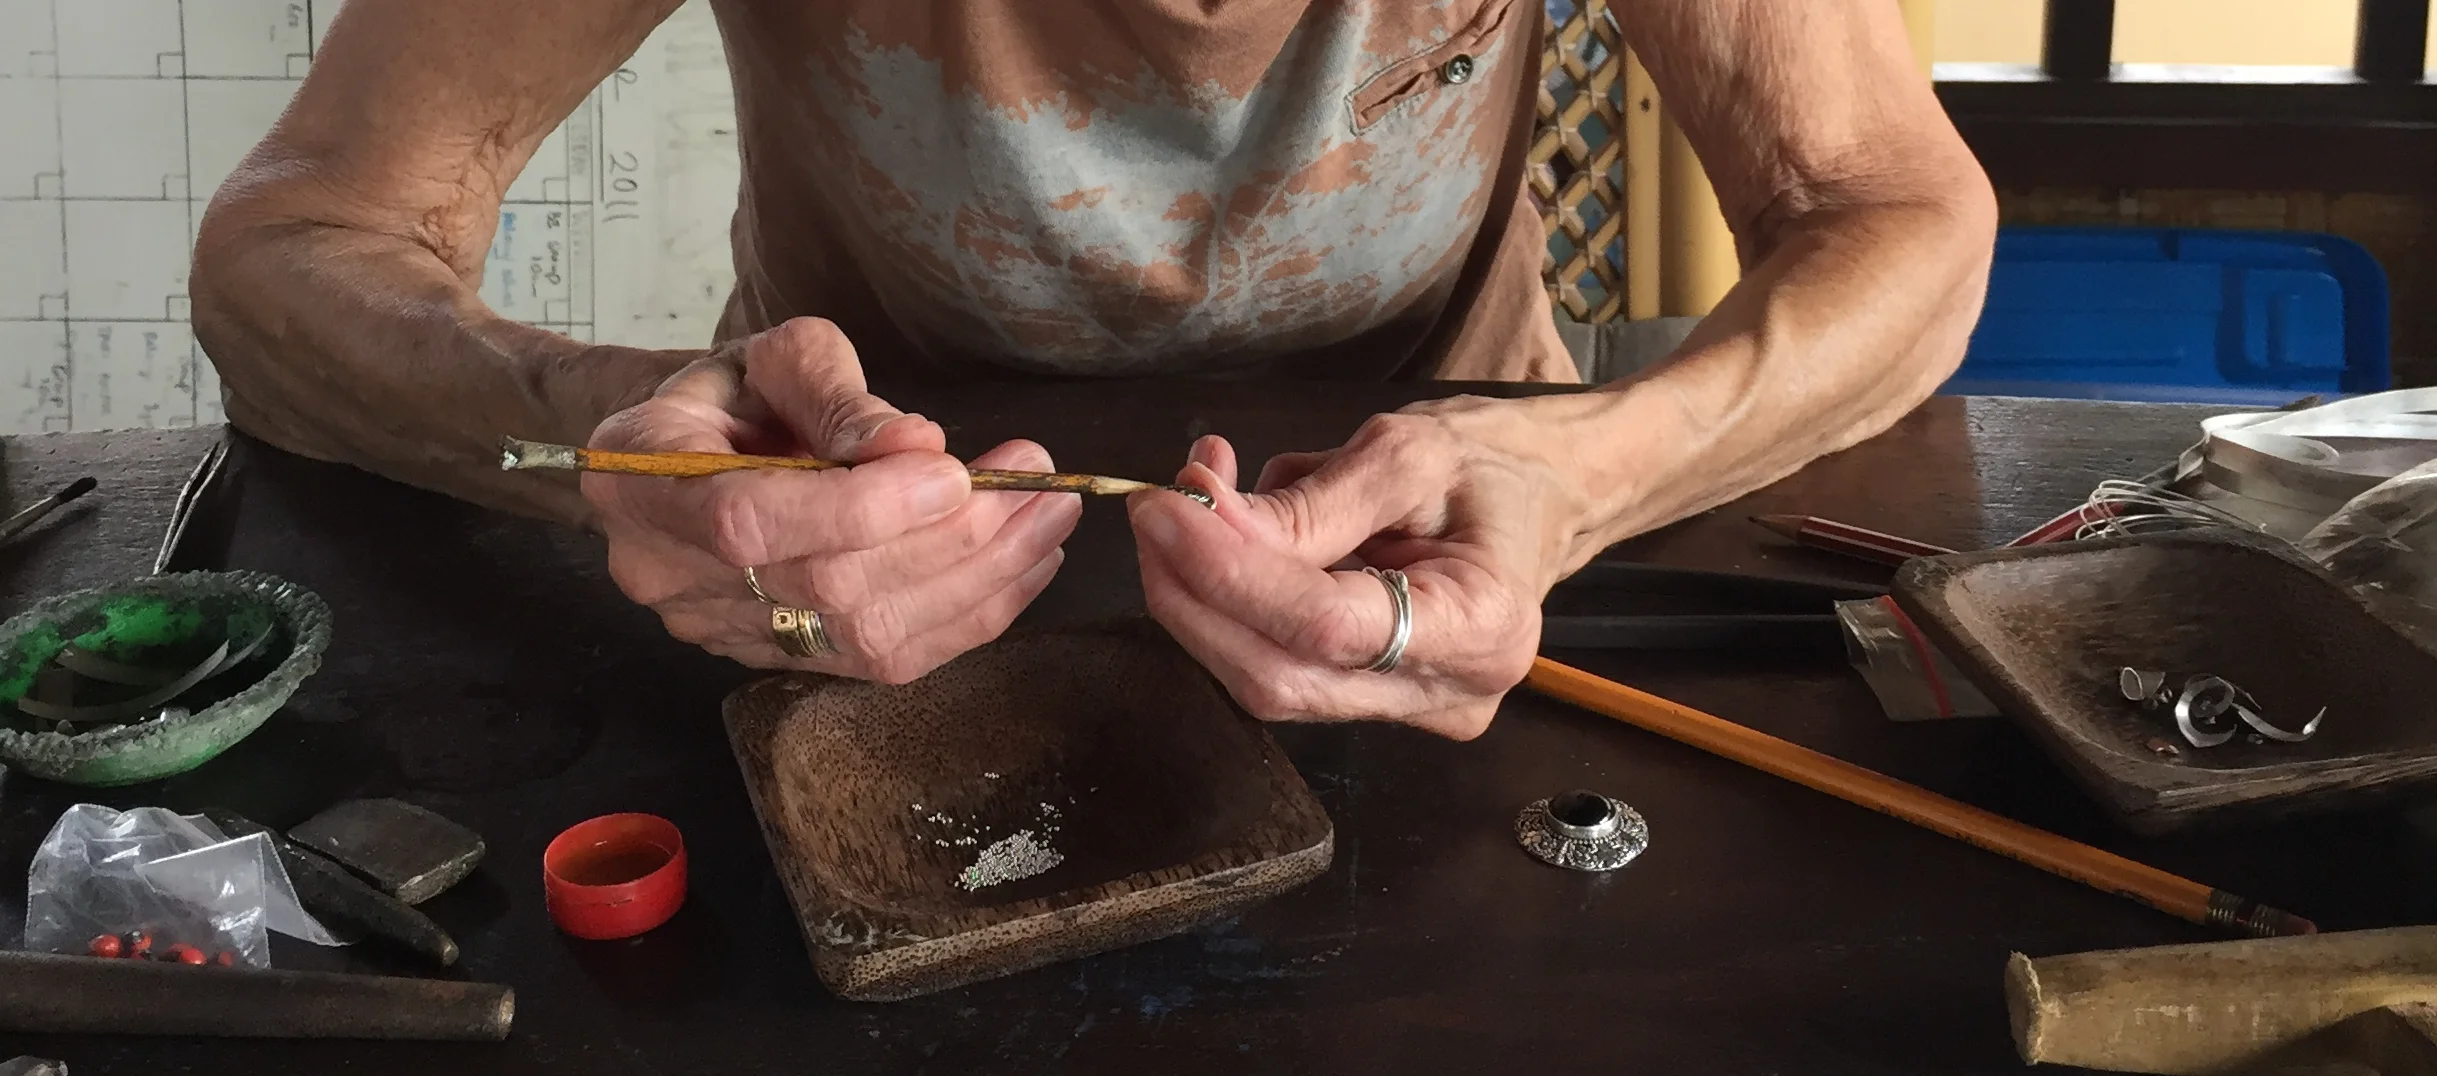
Small beads were added by placing them with a thin wooden stick on top of a layer of glue made from the seed of a local plant..the glue was only good for a day.

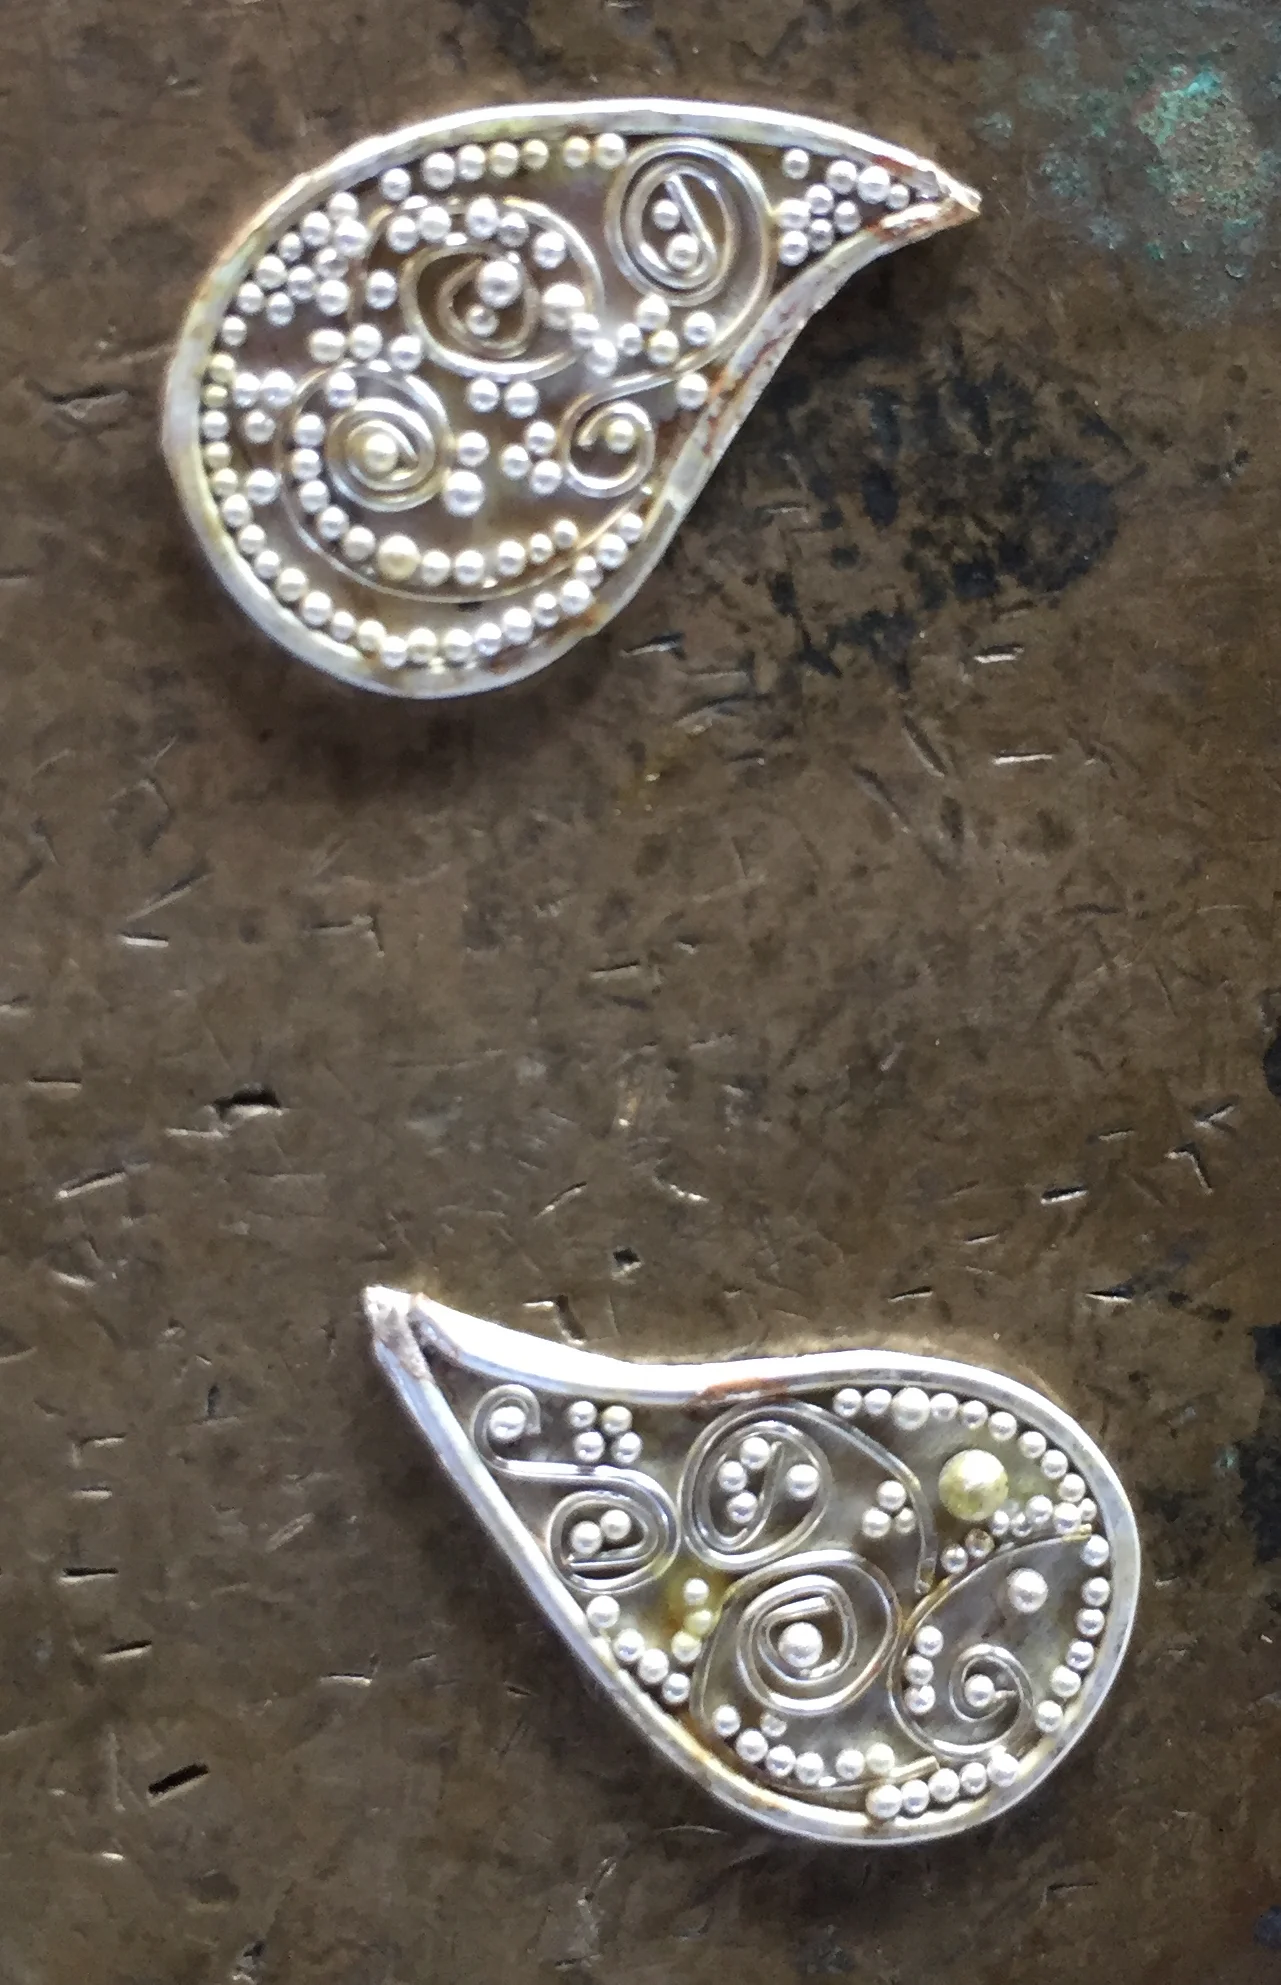
Once the paisleys were finished the band was added directly to the edge

After I oxcidized the background I polished it and it was added to my collection of bangles

Easy Recipe: Make Pesto Like a Pro

One of my favorite summer herbs is basil: its fragrant aroma and versatility makes it an irresistible ingredient in appetizers, salads, and main courses.  Find it available in bunches (with or without its roots), or as small plants, fresh and abundant at local farmer's markets. I grow some every year for my favorite basil pesto recipe, and I make extra to freeze for the winter. This year I  planted a 6 pack of small basil plants in an outdoor planter, which grew into 18-inch tall plants.  While I don't claim to have a green thumb, these plants yielded some beautiful basil leaves, which I picked for use in the recipe you see here. As with any recipe, be sure to use the freshest and best ingredients available for an amazing, delicious pesto!

Basil Pesto for 2

Ingredients:

  • 1/2 cup packed basil
  • 1 tablespoon pine nuts
  • 1 garlic clove
  • salt
  • 3 to 4 tablespoons olive oil
  • 1/3 cup freshly grated Parmigiano Reggiano cheese

Directions:

Combine the following ingredients together in a blender or food processor: basil, oil, garlic, pine nuts, and pinch of salt. (If doing this by hand using a mortar and pestle, pound the dry ingredients together first, then add the olive oil). 

Blend into a smooth green sauce. 

Transfer the mixture to a bowl. Stir in the cheese.

Prepare your favorite pasta. I usually follow the rule of thumb and make about 1/4 lb. per person. 

I prepared rotini pasta for this dish, which has a shape that holds the pesto really well. Add your pesto to hot pasta, using as much as you like. Also makes a great appetizer spread on toasted French bread. Store any extra in the fridge, but be sure to use it within a few days.

Tips for Freezing: Withhold the cheese to add later on, and freeze in small batches or cube sized containers for easy defrosting to add to favorite recipes.  Enjoy!

Post by: Nicoletta Siccone / ETSY Shop: ArtologieDesigns / Website: www.art-ologie.com

Nicoletta is a lifelong artist and art educator, with an M.A. in Art Education and Administration. She travels the world seeking cultural inspiration for her art, and has worked in fibers, acrylics, oils, and sculpture. Her current work is inspired by the reinvention of the mundane zipper, elevated to an art form into unexpected jewelry designs, and shown throughout the New York/New Jersey area as Artologie Zipper Jewelry.

NY Handmade Collective Travels: India part 2

A few months ago, I took an amazing trip to a friend's wedding, near Jaipur, in India (I recounted the wedding itself in this post).  Of course, once I arrived in such an exciting, long-dreamt of location, I couldn't just head right home - I had to explore!  I find bright colors and interesting textiles incredibly inspirational, and my entire trip was a continual jolt of creative stimuli. I traveled around the 'golden triangle' - a popular tourist route, through Jaipur, Ranthambore National Park, Agra, and back to Delhi - and this route is classic for a reason.  It gave an amazing introduction into a huge, complex and fascinating country.  

I was also lucky to be in India during the festival of Holi, a spring festival famous for vibrant colors and joyful celebration. We played Holi with the classic fluorescent powders in Jaipur, and it was a unique, lovely day.

Holi is fun for all ages!

We also arranged for exfoliating scrubs that night at our hotel so we got squeaky clean after all that playing with powder.

After we washed off the awesome rainbow that was Holi, we set out to explore Jaipur.  Jaipur is known as the 'pink city' although the color of all of the gorgeous historic buildings is a bit more salmon-hued, in my humble opinion, but no less beautiful for being a slight misnomer.

In addition to the incredible architectural detail that graced every corner, Jaipur is famous for its textiles and jewels.  I was lucky enough to learn about about how they make the classic block print pattern, and I even got to try my hand at it. [Not pictured: all of the textiles and clothing I purchased and brought back with me!  We did a lot of research so that we made sure to shop in places with fair business practices that pay their artisans proper wages.  I also learned that due to the nature of block printing, slight overlaps in the blocks that show in the reprinting can actually be desirable, as it shows that something is actually blocked out by hand. I had a number of pieces made just for me, using textiles and saris that I fell in love with, and every piece is so colorful and distinct.]

Of course, I was also inspired a bit more directly by some of the sights in India - since I paint animals, I couldn't resist depicting a few of India's goofiest and well-dressed camels.

This is just one of the animals I was lucky enough to depict from my own photographs!

I hope you enjoyed this peek into my adventures in Jaipur and the creativity they inspired; may the colors, shapes and patterns of the photos in turn spark some of your own creative thoughts!

Summer Homes at Chautauqua Institution

A passing summer storm backdrops the Chautauqua Institution Bell Tower at dusk.

Want to spend a quiet week by a beautiful lake while enjoying the arts and intellectual pursuits? You can't find a lovelier, music-dance-opera-books-arts-lectures spot than Chautauqua Institution in far western New York, just past Jamestown and a hour south of Buffalo.  A gate ticket not only allows you to surround yourself with lovely old homes and luscious gardens in the car restricted grounds, but entertains you with their symphony orchestra and school of dance in the evenings at their open air amphitheater.  Almost everyday there are lectures by leading thinkers and national figures.  You can bike, run, swim, kayak, sail, fish, and take all kinds of classes through their Special Studies program. I've taken ceramics classes, learned to solder silver rings, and exercised beside the lake.

I discovered Chautauqua because my husband grew up in the area and took me there to meet his family and friends.  I had read about the history of the Chautauqua Shows in high school and was delighted to see it was still carrying on it's worthy mission of bringing culture, religion and learning to the masses.  It started as a summer campground, and eventually the tents were replaced with victorian cottages, and now the cottages are either restored or replaced, and many have been turned into expensive summer homes.  We've been visiting Chautauqua now for two decades and I'd like to share with you some of my favorite homes.

This beautiful white victorian confection faces the lake and was the first house we stayed in together.  My husband's brother had rented it for the summer and we were lucky to be his guests!

This asian inspired craftsman bungalow was built with reused materials, including blocks from a former public school.  Fittingly, it faces the Institution's children's school, where elementary age vacationers can go to morning camp.

This brightly remodeled Victorian has long been one of my favorites.  Aqua, lavender and hydrangeas - what's not to love?

This splendid green and white new Victorian has porches that never end and is near the amphitheater.  The architect did an amazing job with an awkwardly narrow and hilly spot.

Tiny, pink, and adorable.  Just wait till you see the fairy garden attached!


For more information on Chautauqua Institution, follow this link: http://chq.org

Terrace Garden in NYC

As one of the lucky New Yorkers with an outdoor space, and someone who spent several years in Oregon growing a garden, it was only natural to fill my terrace with potted plants. One side of my terrace is sunny for a longer part of the day, most of the things on this side are edible.

I brought the chives with me from my community garden space in the East Village. They are about 25 years old and surprise me every year when they pop up after winter’s cold!

The lavender is about 7 years old. It took me a few tries to get the right growing conditions, they don’t like too much water so well drained soil is important.

My cat Sugar loves the scent especially when they flower.

This year was my first try at peas. I planted them a little late so though I got some it wasn't really enough for more than a few added to some that I bought at the farmer market. It was very interesting to watch them pop out of the flowers though. Not to mention tasty!

There’s enough lettuce & arugula to make a lunch salad everyday. It’s so much fun to pick & choose the pieces I want that day! I usually have a nasturtium to add too, it really sparks it up with a slightly spicy taste. Just a few radish slices and some avocado and Viola! Lunch! 

Post by Susan Rae Tannenbaum of Violet Rae 

Indoor Gardening

Do you think your living space is too small for an indoor garden? Think again! Even if you don't have a "green thumb", or simply don't have the time, it is possible to grow your own garden indoors, any time of the year, in a small space. I had my doubts when a friend recommended this tabletop unit to grow lettuce, herbs, flowers,  and even vegetables such as cherry tomatoes and hot peppers! It sounded incredible, but I took the plunge and invested @$50 in the smallest countertop garden unit. It is self-watering, with an LCD light, and can accommodate up to 3 plants. Bigger units will require more space, and can hold more sprouts. I liked the narrow shape, size, and color of this particular one.

Equipment: 

  • Seed Pods:The unit came with 3 seed pods, and I ordered 3 more. Each seed pod is labeled with number of days needed for germination and plant heights.. 
  • Nutrients: Each seed pod kit includes a bottle of nutrients.
  • Domes: These are plastic lids which create a "greenhouse", and encourages growth.

Set-Up: 

  1. Add water to fill line. Be sure it's room temperature. City water is fine.
  2. Insert your seed pods. Place tallest in the back of the unit.
  3. Cover the pods with the cute little plastic domes. They won't really snap on, but don't worry. These lids stay on until the pods have sprouted and the leaves grow big enough to touch the tops of the lids.
  4. Remove the lid from the well and add a capful of nutrients (see photo below). When the plants need more, a light will go on. Usually every two weeks.
  5. Plug it in to turn the light on. Just know that the time you plug it in, is the time the light will go on every day, automatically. It will stay on for 16 hours/day. It has automatic shut-off, so you don't need to keep track of how much light your plants are getting. Note: The light is VERY bright, so you may want to set it so that it doesn't interfere with your sleep patterns!

That's it! Depending on what you plant, you should see sprouts within 10 days! I began with a lettuce, basil, and lavender. I suspect I shoudn't have mixed up my plants, because my basil failed to sprout. I think it was taken over by the lettuce, which did extremely well, however. So far, I have been most successful with lettuce and lavender. I planted rosemary, which did sprout, but has been slow to grow. In the future I am probably going to grow my herbs together. I have yet to try tomatoes and peppers.

I was so excited when my lavender actually flowered! As you can see, the lettuce needs pruning, which is recommended to encourage growth and make room for the other plants. The light is adjustable and can be raised as plants grow. I hope you will give this a try, even if you don't have a "green thumb"! Be sure to leave a comment if you do and share your tips for indoor gardening. Happy planting!

Post by: Nicoletta Siccone / ETSY Shop: ArtologieDesigns / Website: www.art-ologie.com

Nicoletta is a lifelong artist and art educator, with an M.A. in Art Education and Administration. She travels the world seeking cultural inspiration for her art, and has worked in fibers, acrylics, oils, and sculpture. Her current work is inspired by the reinvention of the mundane zipper, elevated to an art form into unexpected jewelry designs, and shown throughout the New York/New Jersey area as Artologie Zipper Jewelry.