DIY: Fall Patchwork Kitchen Trivet Tutorial

It's National Sewing Month! Did you know that? Did you know it was President Regan who started  National Sewing Month in 1982.  He wanted to celebrate and honor the importance of home sewing in the United States.  If you want to learn more about National Sewing Month check out the National Sewing Month website.  However I am here to show you how to make a Patchwork Trivet just in time for the beginning of tea and soup season.   This is a good project for a beginner or intermediate but you do need to know how to use a sewing machine.

Materials:

scissors or rotary cutter

pins /  iron

double wide bias tape 

cotton woven fabric scraps adding up to 9" square

Insul Bright batting

wool - I use Mary Flanagan wool that comes in beautiful colors and patterns 

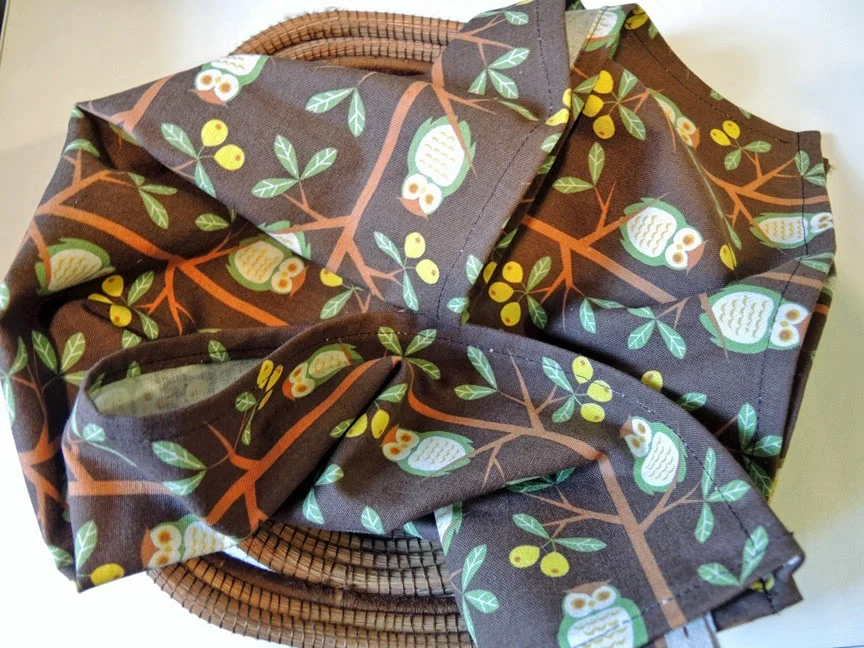
1. Cut your cotton woven fabric scraps into 3" squares.  I used 3 different patterns/colors. 

2. Arrange your squares into the design you would like for the top part of the trivet. 

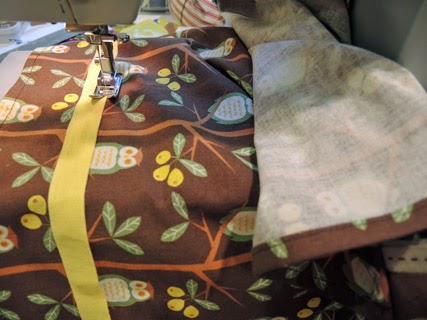
3.  Once you decide on your design, take 2 squares and lay them face to face, pin them and sew 1/4" seam allowance on one side. 

5. Remove the pins and with a hot iron and the back side facing up, press the seam to the darker fabric side. 

6.  Arrange your pieces again into your desired design.  You can see in my photo I sewed 6 pieces together to create 3 2 patch blocks.  My design is 3 swatches across, 2 are sewn and the 3rd isn't.  Now I will sew a third square onto each row of 2.

PATCHWORK TRIVET TUTORIAL 6.png

Continue this step with the other 2 rows of 2 squares each and this will complete your trivet top.

Next Friday will be part 2 of this tutorial and I will show you how to make your quilt sandwich and  complete the trivet. 

Have a great weekend! And please ask any questions or comments below!

Tracey

www.traceytoole.etsy.com

www.traceytoole.com

Setting the Table: Sewing 101 Lesson 2

A few weeks ago I wrote about DIY and Setting the Table.

 I taught you how to make a reversible napkin.   In today's tutorial I will teach you how to make a Tea Towel.  I like giving tea towels as hostess gifts.  I usually will give two wrapped up in pretty packaging.  Tea towels are great to use for many reasons.  You can hang them on a stove for decoration.  You can use them on a small table or coffee table for serving hors d'oeuvre.  You can use them in a basket as a bread roll blanket or under a dish rack as a drying cloth.  It is a very multi purpose textile.

In this week's edition of Setting the Table I will show you a quick and easy way to make a tea towel.  Very easy for the beginner.  There is also an option at the end of the tutorial to add a ribbon detail.

Supplies:

5/8 yard of home dec weight or medium weight cotton woven or cotton linen fabric

6" of 1/2" or 3/8" wide twill tape or trim (I use a linen cotton webbing)

3/4 yard of 5/8" wide ribbon or twill tape for decoration (I use a ribbon called Fettucia

from Purl Soho)

Pre-wash all fabric.

1. Cut a piece 20" wide and 28" long

2. fold all 4 sides in at 1/2" and press

3. fold in again 1/2" seam allowance and press.  I press with the pins in to hold down the fabric for me. You can pin the pins all the way but I just push them into the ironing board. If you are more comfortable you can pin the seam allowance completely.  Once you press it with steam, the seam allowance should stay flat without the assistance of the pins.

(note: pressing is with the iron on steam)

5.  Cut 6" of your thinner webbing or ribbon for your hanging loop.  My fabric has a directional print, there is an actual top.  Fold your webbing in half.  At the top of my towel on the shorter side and 1" in from the side seam place the raw edges of the loop under the seam allowance and fold towards the top so it overlaps the top edge and pin in place.

Now sew a 3/8" seam allowance.

4. Sew all four sides at once, pivoting at each corner.

(note: Pivoting is sewing down one side to the corner, leave the needle in the fabric and lift presser foot.  Turn your fabric, place presser foot back down and sew the next side. There is no need to back stitch since this is one continuous seam.)

5. Press.  Finished!

Now an optional decoration is adding a ribbon, rick rack or pom poms to your tea towel.  You will need 22" long of trim. (Or 25" if you want to make a loop on one of the sides, read step 7).

I used a beautiful yellow ribbon called Fettucia.

6.  2" from your bottom fold place your ribbon with 1" overlapping each long edge.  Pin in place.

7. Fold underneath twice so the raw edge is not shown.  If you want, you can cut this ribbon at 25" long and on one side fold a loop to the back side.  You then have a side hanging loop. This is shown in the photo.

8. Sew an edge stitch, pivoting. Normally you shouldn't have your fabric underneath your arm of the sewing machine.  But in this case since you are pivoting you will need to roll up the fabric when you sew the other side of the ribbon.

9. Press and finished.

If you would like to give this as a gift I suggest making two so buy double the amount of fabric or buy the same amount in a complimentary print.

Happy Crafting!

Thanks!

Tracey  //  http://traceytoole.etsy.com/

Setting the Table: Sewing 101


In New York City most apartments are on the small side.  We live in shoe boxes.  Most of us all live on tight budgets.  And most of us are single and like to go out.  Sometimes though it is nice to entertain, even in our little shoe box.  I used to live in a 300 square foot apartment.  My husband to this day makes fun of it.  It was my bed, my work table, and 3 cats.  Plus a few bookcases here and there.  It was cozy.  It was in Hells Kitchen which is a very fun place to hang out in and filled with history.  Even though I lived in a small studio I still liked to have friends over.  I didn't have chairs or a dining table but we could have drinks and appetizers.  Entertaining is nice, pleasant, cozy and personal.

The next few weeks I will be posting a series of DIY called Setting the Table.  You don't need to be an expert sewist to do these projects but it will help if you know the machine.  

There will be projects for every living situation.  We will start with simple and easy, a napkin.

double sided napkin using Liberty Wiltshire backed with muslin

tea towel  (spoon by Cor Pottery)

tea towel  (spoon by Cor Pottery)

Moving on to a tea towel with hanging loop.

felt octagon coasters (mug by LennyMud )

felt octagon coasters (mug by LennyMud )

Felt coasters

Table cloth

Embroidered placemats

Quilted table runner

table runner and coaster

table runner and coaster

Each above item can be used in any table setting, big or small, casual or formal.  What will determine the feel is what fabric you use.

The first project, the double sided napkin, can be used for every day meals or only when special meals with guests are held.

Materials:

  • For 4 Reversible Napkins
  • 1 yard of 44" wide fabric - quilting cotton, broadcloth, or light to medium weight cotton woven fabric
  • 1 yard of 44" wide
  • 200 count muslin
  •  I use the higher count muslin because it is much softer than regular dress maker's muslin
  • matching cotton or poly machine thread.  I prefer Gutterman brand but Coats and Clark is also good.
  • Size 10 machine needle

All fabric should be pre-washed.

1. You can layer both pieces of fabric on top of each other for cutting.   Cut out 4 18" squares.

I use a rotary knife to make sure I cut a completely even square

2.  Lay one piece of muslin and one piece of your print face to face.  Muslin has no face so just choose one side.  Pin it together.  Sew 3/8" seam allowance on all sides leaving a 4" opening.  When you are sewing the sides continue with one seam,  you will pivot when you get to each corner.  Start your sewing in the middle of one of the seam allowances, so don't start at a corner.  Press with a steam iron.

The face is the nice side. 

Pivot at the corners

 3. Pivoting: Leave your needle in at the corner, raise your presser foot and turn the fabric to sew the next seam.

Leave a 4" opening so you can turn the napkin back to the right side.

Clip corners before turning out

4. Clip corners before turning back to the right side. This reduces bulk and will help you get nice pointy corners.  Use a point turner for this.  I like the bamboo kind.

5. After turning out, press with a steamy iron. And sew around all 4 sides using a 1/4" seam allowance. And press again.

 Finished! Beautiful and soft spring napkins!

The next post will be making a tea towel with hanging utility loop.

Thanks,

Tracey

https://www.etsy.com/shop/traceytoole

DIY: April showers tees

“April showers bring May flowers” or so they say. Well, I say make April showers fun with a rain inspired D.I.Y project. The weather is slowly warming up and my kids are longing for those special hours of outside play. While the clouds resisted to cooperate, we spent some time creating these great t-shirts. Kids love getting crafty, so take your little ones, nieces, nephews or cousins (or just your inner child!) and gather your supplies!

You will need:

* A pre-washed t-shirt

* Freezer paper

* Acrylic paint in colors of your choice

Textile medium

* A foam or spouncer brush

* Exacto knife

* Cardboard

* Surface for mixing colors (I use the cover of a take out container)

* April Showers stencil

1. Make your stencil. Click on the link to get the April Showers stencil. Cut a piece of freezer paper to  fit the image's 8.5" x 11" size. Feed the piece of freezer paper through the printer manually as you print the image, making sure the artwork gets printed on the dull side of the paper. Carefully cut out the drops and cloud shapes with your exacto knife. You have made your stencil.

2. Iron the stencil onto your t-shirt. Place the stencil shiny-side down on the center of the t-shirt and press with your iron on the hottest setting. Do not use steam.

3. The part the kids love, mixing colors and printing! Mix 2 parts acrylic paint/ 1 part textile medium. Textile medium is great because you can use acrylic paints to paint, stamp or print on fabric without having to spend a big budget on textile inks and your project will be washable. Place the piece of cardboard inside the t-shirt, under the stencil, so that the paint doesn’t transfer to the back. Take your sponge brush and dab it on the cloud area. Make sure you cover the whole thing. If you’re letting kids do this part, let them have fun while guiding them.

4. Move on to printing the drops. Mix different colors and dab your sponge brush. For lighter colors, you may need two coats of paint. Let the first coat dry before doing the second one.

5. Let the paint dry for at least an hour or so. Gently remove the stencil off of the t-shirt. Your stencil can be re-used a few more times so don’t throw it away!

6. Heat set the design on the fabric. Using your iron in the hottest setting, iron over the printed area for 20-30 seconds. Do not use steam. Wear and enjoy!

My kids are very happy with the results and are proudly saying “I made this”. Now they’re thinking to make them as gifts for all their friends but I’m not so sure about that... Remember to supervise children while doing this project, only adults should do steps. 1. 2. and 6.

Have fun and please share pictures of your April showers tees!

Natasha K.

*on Etsy*

*on Facebook*

Rice, Fabric and Some Basic Sewing Skills- Make a Door Snake!

My husband and I moved into a ground floor apartment two years ago.  Two winters have passed.  There are 2 doors into the foyer where our main door is located.  The second entryway door is always left open creating a very chilly hall way in the winter.  This lovely chill makes it's way into our apartment via under the door.  Now with a baby who spends alot of time on the floor we had to fix the problem.  Time for me to make a draft blocker also called a snake.  If you have a machine and fabric this will take no time at all.  It probably will take you longer to go to the store to pick up the rice.

      SUPPLIES 

  • 1/4 yard of woven fabric that is 44" wide

  • rice

  • sewing machine

  • I used a basic quilting cotton for one side and a ticking canvas for the other side

  1. measure the length of your door
  2. cut fabric to be this length with a width of 3 1/2 - two pieces needed
  3. lay fabric face to face and sew 3  sides with 1/2" seam allowance keeping a short side open
  4. turn inside out using a loop turner or a safety pin with a ribbon attached.

Ok what's a loop turner?     Check out this fantastic description on burdastyle.com for instructions.

  1. pour rice in
  2. turn in seams at the opening and sew shut

All done and warm! Please let me know if you have any questions.

Happy Crafting!

Tracey  //  http://traceytoole.blogspot.com/

etsy shop

Binding

While looking for inspiration I scrolled through recent blog posts published by Etsy NY team members on their personal blogs, when this post by Tracey, one of our own contributors, caught my eye.

In her post Tracey shows us a number of different uses of bias tape like the panel trim on this little dress. Binding tape basically consists of strips of fabric that are sewn together until they are long enough to go around the item you want to decorate. There are two types of binding tape:

  1. Bias tape where the fabric is cut at a 45 degree angle to the grain of the fabric resulting in a stronger binding that easily adjusts to curves; and 
  2. Straight-grain-cut binding where the binding is cut parallel to the grain resulting in a less durable binding that is, however, easier to cut and handle than bias tape

Making your own binding is pretty easy especially when you have one of these handy bias tape makers that look like this:

This is my 1/2″ tape maker.

You cut up your fabric to the requisite width, feed it through the tape maker and it comes out perfectly folded on the other side. You then fold the tape in half and iron it flat. I used this tape to decorate an upcycled cardigan

and a cashmere throw

Amy Karol still has the best and funniest instructions on how to sew on bias tape. Check out her video here:

 So, what will you do with your fabric strips?