Tools of the Trade

Crafters are people who like to work with their hands. I wasn’t aware that I was one until digital photography came along and I gave up processing and printing my own photos. In a matter of weeks I went from the nice, relaxed me I had always been to a fidgety, irritable curmudgeon yelling at my friends to “pipe down”. I wish I was exaggerating.            

It became apparent that I needed to fill the void. I tried a variety of new crafts from knitting, to baking, to candlestick making. (Hahaha! Not really, I just wanted to rhyme.) Seriously though, I even tried welding. None of them were for me. Something was always wrong with the way it felt in my hands. I’d turned into freaking Goldilocks.

These knitting needles are to long. This rolling pin is to short. This acetylene torch keeps catching my pants on fire.

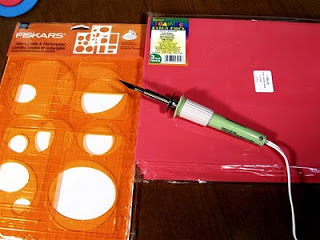
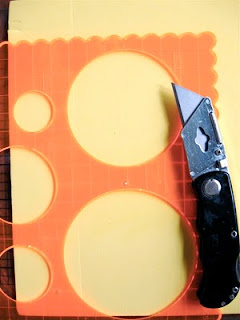
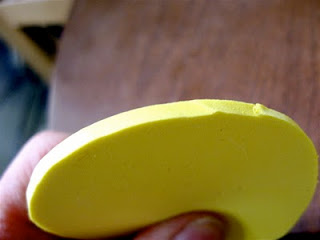
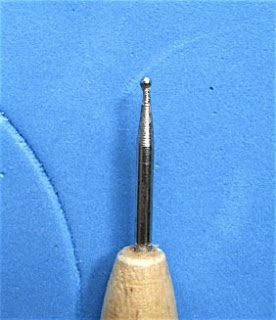
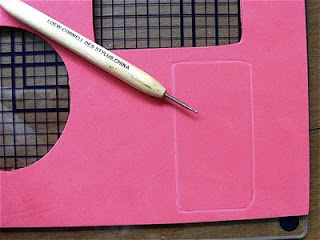
The swivel head that started me down the paper cutting path

So, that is why, two years ago, I was wandering aimlessly around a crafts store hoping to find something, anything that felt right when I came across the single coolest object I’d ever seen; the fingertip swivel head knife by Fiskars. I took it home and put it to work. I didn’t have a plan; I just wanted to make stuff with my new tool. Today it is how I make my living. I’m a paper cutter. I didn’t even know this was a thing when I started. I just liked the way the blade felt in my hand.

Natasha from Wink and Flip found her soul mate tool early, “As a teen, I didn't know if it was easy to find T-pins, so I treated mine like a rare diamond, always pinning it in a secret place so I could find it again. I would have been lost without it.”

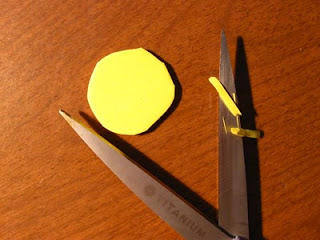
The T-pin and a piece from the curated line sold at Wink and Flip

Not every tool we come across changes our lives, but all of them have a way of making us better at what we do. Aziza from Aziza Jewelry uses hers to perfect her craft. “My favorite tool at the moment is my hammer. I use it to stamp my name on my name tags (…) if I hit my stamp right on; the stamps come out perfect...or sometimes not so perfect. I get to keep learning what works and what doesn’t work.” and Martin from Adornments NYC uses his to explore new materials. “My favorite tool lately is FIRE!  I've been doing a lot of fire polishing of vintage (and new) metals and I love it!  Each piece of metal is a little adventure, as you never know exactly how it will turn out…”

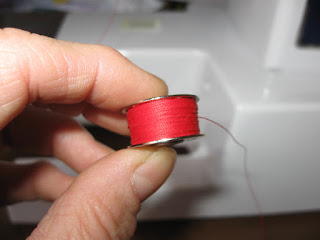
Lola's Bodkin and thread snippers accompany one of her handmade bags

Even the simplest tools can be indispensable. Lola of Lola Falk Designs points out that her thread nippers and bodkins are, “two of the cheapest tools in my arsenal, but definitely the two I can't live without.”

I realize most people start with a craft and then acquire the tools, but no matter how you go about it there is no denying that the right one can make your life easier and your craft better. Thanks for all your responses! It made my first blog here a lot of fun! Until next time.  

Jessica Alpern

Egghead Learns to Sew, Part III

Today I thread the needle (or "upper thread," in the parlance of the Instruction Manual) of my fabulous Christmas-gift sewing machine, inching ever closer to efficiently and effectively stitching fabric and making all kinds of wonderful textile-artistic things! Yay!
Excitement is beginning to overtake the nervousness I initially felt at this prospect.


The Parts

Threading the upper thread involves a few previously labeled parts of the machine, namely, the spool pin, bobbin-winder/thread guide, thread tension knob (although indirectly), and the thread take-up lever; plus a few unnamed parts. One of the unnamed parts is located behind the the face plate cover. The others are attached to the named parts, which may explain why they're not specifically named. In any case, the Instruction Manual provides a diagram (pictured above) of the path the thread is supposed to travel through these parts on its way to the needle. While it's reasonably easy to follow, it would benefit from color photos and a bit of narrative. This is where the the current post comes in.

The Steps

Obviously, the first step is to place thread on the spool pin. (This is Step A on the diagram, in case you're following that as well.) Now you're on your way. The thread's first touch-point is the bobbin-winder tension knob and thread guide. Pass the thread under the bobbin-winder aspect of this part of the machine (the circular bit in top) and through the little horizontal hook part just below and in front of it (Step B on the diagram).

Pull the thread down to the thread tension dial. Just behind the dial itself are a couple of circular plates. The space between the plates is where the thread passes through. Attached to the tension knob/twin plates is a delicate little hooky-loopy thing. Pass the thread in-between the plates and through the delicate hooky-loop (Step C on the diagram).

Now, pull the thread up and through another hook located just above and to the left of the thread tension dial/twin plates (Step E).

Keep pulling up. Pass the thread through the thread take-up lever (Step F). It's probably easiest to do this if the lever is in its upper-most position. To get it there, turn the hand wheel clutch (the larger of the two wheels on the right side of the machine) slowly towards you.

Next, open the face cover and pull the thread down and through another hooky thing located at the very bottom of that whole inside-the face-cover section of the machine (Step G). Close the face cover.

Keep pulling down and pass the thread through a final hooky-loopy thing located at the base of the needle bar (Step H).

Now, get ready. You're about to complete the circuit of hooky-loopy things and actually thread the needle of the machine. The diagram combines this step with Step H above but I think it deserves its own Step. After all, it is the gateway Step to effectively and efficiently stitching up all kind of wonderfulness. I know you can hardly stand the anticipation anymore, so without further ado....

Find the eye of the needle. It's just above the pointy end. Pull the thread down so you have a little slack. Then pass the end of the thread through the eye and pull it toward the back of the machine.

You did it! Make yourself a cup of tea and relax for a while before moving onto the final set of precursor steps to learning to sew on a machine, namely, inserting the bobbin into the bobbin case and uniting the bobbin thread with the thread you just threaded. What?! Don't worry, I'll explain.

Until next time --


Linda

Egghead Learns to Sew, Part II


In this installment of my klutzy-bookish guide to learning to sew on a machine, I explain how to wind a bobbin. For those of you who never took sewing in school, the bobbin is essentially the spool of thread that contributes the bottom stitch. While it's not really necessary to wind your own bobbin --- you can buy them pre-wound --- I thought the process of doing so would be a manageable way to introduce thread and electricity to the post-it labeled parts of my machine and thus, to dip my toe into actually using it.

I began by identifying the relevant parts: the spool pin, bobbin winder tension knob, bobbin winder spindle, bobbin-winder stop, and the stop clutch knob. The diagram above shows these parts in relation to each other, albeit from the back of the machine (which, incidentally, I found confusing; the owner's manual is my friend, but, it turns out, not the most reliable one, alas). The pictures below show what these parts actually look like.


It took me poking around for awhile to figure out how to extend the spool pin so it was long enough to hold a spool of thread. Once I scaled that hurdle I followed the instructions in the owner's manual and placed the bobbin on the bobbin winder spindle, pushed the spindle to the right to engage it, and released the clutch.


Next I plugged the machine in. Ack! Electricity! We're getting serious now. I paused to collect myself and then put my spool of thread on the spool pin and wound the thread twice around the bobbin winder tension knob. The owner's manual didn't explain how exactly to attach the end of the thread to the bobbin so I just wrapped it around a few times and hoped for the best.


I depressed the foot control and lo! The thread began to wind itself around the bobbin! I marveled at how evenly the the thread distributed itself. I was also impressed that the machine knew when the bobbin was full. When the bobbin winder stop stopped turning, I was done. Nothing got jammed up or tangled. Yay!


I snipped the end of the thread with a scissor, removed the bobbin from the bobbin winder spindle, and felt accomplished. And relieved.


Until next time, when I go inside the machine to insert the bobbin, and thread the upper thread into the needle --


Linda

Tools on Tuesday: Hot Knife


About a year ago I became interested in working with EVA (Ethylene Vinyl Acetate) foam, a dense and somewhat rubbery material commonly found in craft stores (often in the form of model kits for kids). I was looking for a way to make colorful, lightweight yet durable sculptural shapes that didn't involve painting. I found myself a great tutorial about working with EVA foam and got myself the recommended tools and a few 1 mm sheets to play around with. As the tutorial had warned, I found the foam extremely hard to cut well. You need to use as few strokes of the cutting blade as possible, or else you'll get raggedy, uneven and/or choppy-looking edges. And you CANNOT trim, shape, or otherwise fix said edges after the fact. It just makes a mess---both of the cut piece and your work area!

What a mess!

And I thought that if I really want to make nice-looking things with EVA foam I should use a heavier grade of foam, which would be even harder to cut well. More research led me to the tool I needed: a hot knife. Then life intervened and I had to put my exploration of EVA foam on hold. Then, this past Friday I found out that I didn't get in to the renowned Renegade Craft Fair in June. Wah. So on Saturday I took myself to Michaels for a consolation prize. I still had three packs of 3 mm foam hanging around from a year ago waiting to be used, and a new project, especially one requiring a new tool, would cheer me up.

So I got a hot knife. But not just a hot knife. No. I got the ultra-nifty, anything-you-could-possibly-dream-of-doing-with-a-hot-thingamajig model of hot knife (the Creative HotMarks tool by Walnut Hollow, pictured at top). Not only does it cut, it stamps, burnishes, heat-transfers, and all kinds of other scrapbooky good stuff like that. I don't really need all of those things but I didn't find the basic model of hot knife until after I checked out. It was in the locked cabinet by the shopping carts. So it was kind of too late to get that instead. And I liked the heat-transfer capability of the niftier model. So I took it home.

I'm delighted to report that the hot knife part of the crazy hot thingamajig works on 3 mm foam---not super-great, but waaayyy better than the utility knife I tried first as a comparison. Hooray! Creating lightweight, durable, colorful sculptural shapes without having to paint has become a possibility for me. But it will take practice.

Utility knife, stencil and 3 mm EVA foam. My comparison case.

The results: Choppy...

...and uneven. As compared to:

First cut with the hot knife. Still a little raggedy and uneven, but better, and so much easier!

One thing I learned that may save you some trouble if you try this out yourself is that, at least with 3 mm foam, it's hard to go all the way through the foam without first tracing the shape onto it with your stencil.
The stencil limits your use of the knife blade to just the tip. But tracing the shape with a pen or pencil first will leave marks on your finished pieces. The solution? A stylus!

A stylus is a small hand-held instrument with ball-tipped ends. It's great for poking around in small spaces, and, it turns out, for tracing shapes onto EVA foam. The foam is soft enough for the stylus to leave a visible mark. No ink or graphite needed.


When I traced my shapes first I was able to use more of the knife blade and came away with much cleaner edges. It's still tricky to get the shapes even on all sides, but cleaner edges make a big difference.

When all was said and done I had a bunch of nice-enough pieces with the promise of better ones to come. To flesh out the vision I used my practice pieces to make a little something.


I glued smaller pieces onto larger pieces and then strung them together with fishing line. Voilà! Decor!


Until next time -

Linda